Skyscraper

Wednesday, December 19, 2012

Cacao - Great Gingerbread Houses, Macarons and Salted Caramel Spread

If you read my blog or follow me on Instagram (self promotion, I'm ieatblog on Instagram, go check it out), you'll know that I love to bake. I love the process of baking as it really calms me down as I focus on a task, and of course sometimes the results are both beautiful and delicious, which makes me very happy. So I was extremely happy when I was asked if I wanted to attend a private class with Tim Clark (head pastry chef) at Cacao to learn to make Gingerbread Houses. I've never made one so was really excited to try. I asked my fellow baking superhero Michele to come along as she too loves baking. We both can say that we've baked a wedding cake even, as we helped I-Hua make her wedding cakes.

So, like most good stories, I need to keep you hooked so let me show you a photo of the final result before I reveal the whole process. Look at my beautiful Gingerbread House. Seriously, I can't stop looking at it every time I walk past as it sits in the centre of my dining room table until after Christmas. The house has character and fun and reflects my baking style, messy.

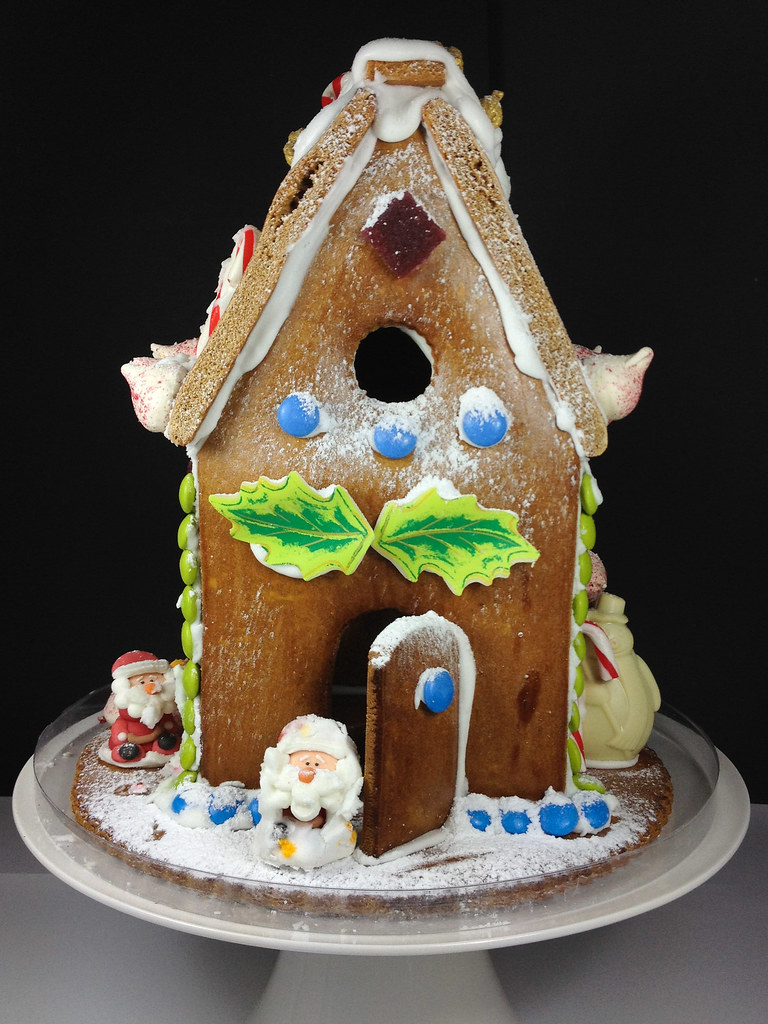
I love many parts of the house but one part which I really love is the gold reindeer poop (as I call it, it's actually gold covered walnuts) on the roof. I think it gives a whole new level of fun.

If we now rewind back to the start, Tim told us about how to make the dough and to bake it and gave us tips. Here are the tips, so take note.

1. Don't overwork the dough when you first mix it. Just mix it enough to make a dough and then put it into the fridge.
2. When you go to knead the dough, you can mix it as hard as you want as this recipe doesn't harden when you knead too much.
3. When baking it, always underbake. If it looks like it's not quite ready yet, it probably is ready. It tends to harden up really badly if you overbake and it won't be enjoyable to eat. If you are purely making it for decorative purposes, you can bake it more.
4. Freshly ground spices work best as the aroma is much stronger. Make your own mix and be creative. Tim used many things including tea, anise, cinnamon etc.
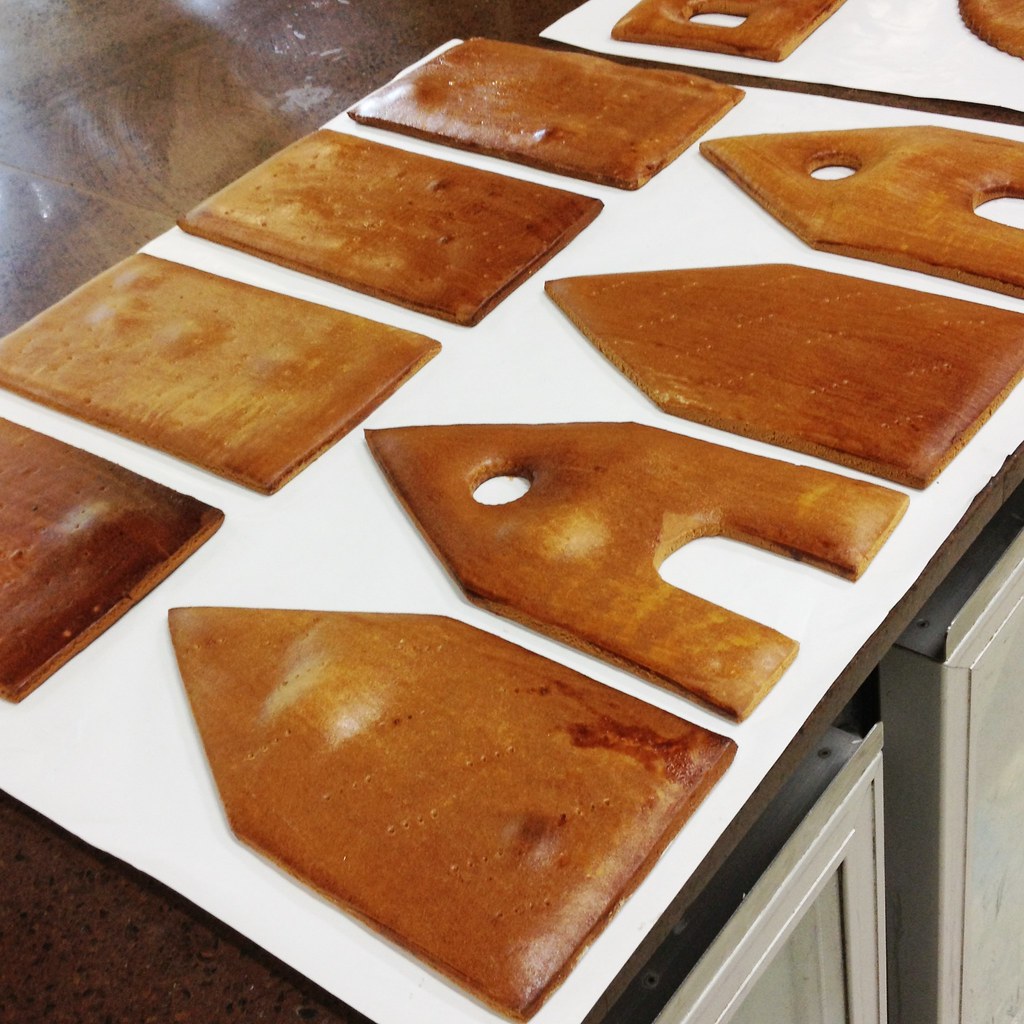
5. Make a template to cut out your house and do a trial run with the template to ensure it all fits together properly. Don't freestyle if you're a beginner and try to cut the dough on the fly if you want a neat looking house. If you don't mind your house looking like a half finished product from Grand Designs, by all means freestyle.
6. This is the most important tip. You can never ever overdecorate a Gingerbread House. The more stuff you throw on it, the better it looks. So go mad and find as many things as you can to put onto it and have heaps of fun.

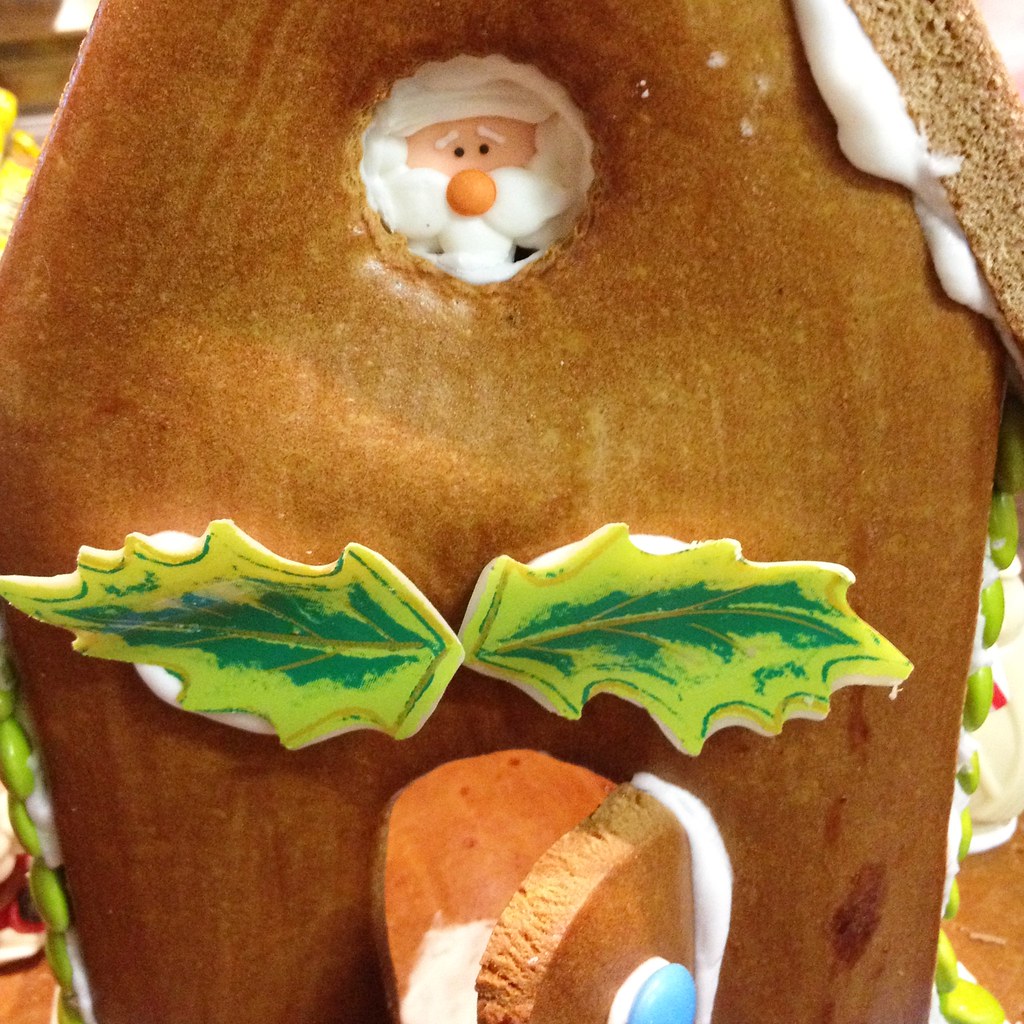
Look at my Santa peeking out of the window. Unfortunately Santa was too fat and the royal icing did not hold him and he fell to the bottom of the house and broke a leg and now is walking in crutches.

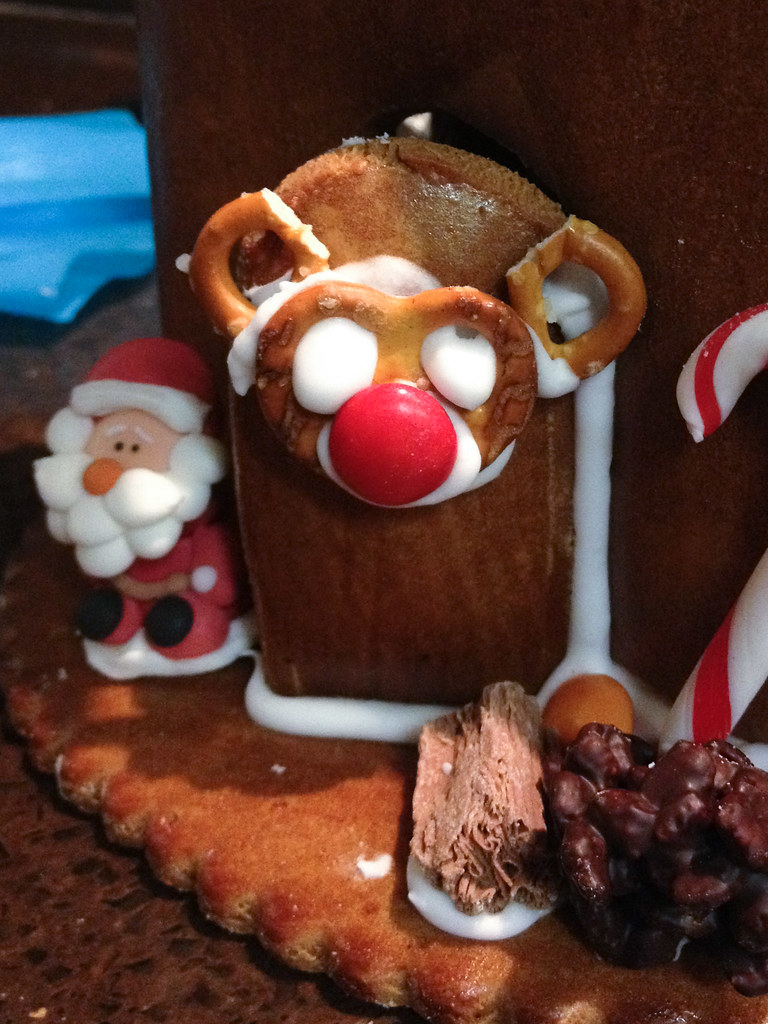
Michele made the cutest door reindeer reef. I'm totally stealing this idea for next time.

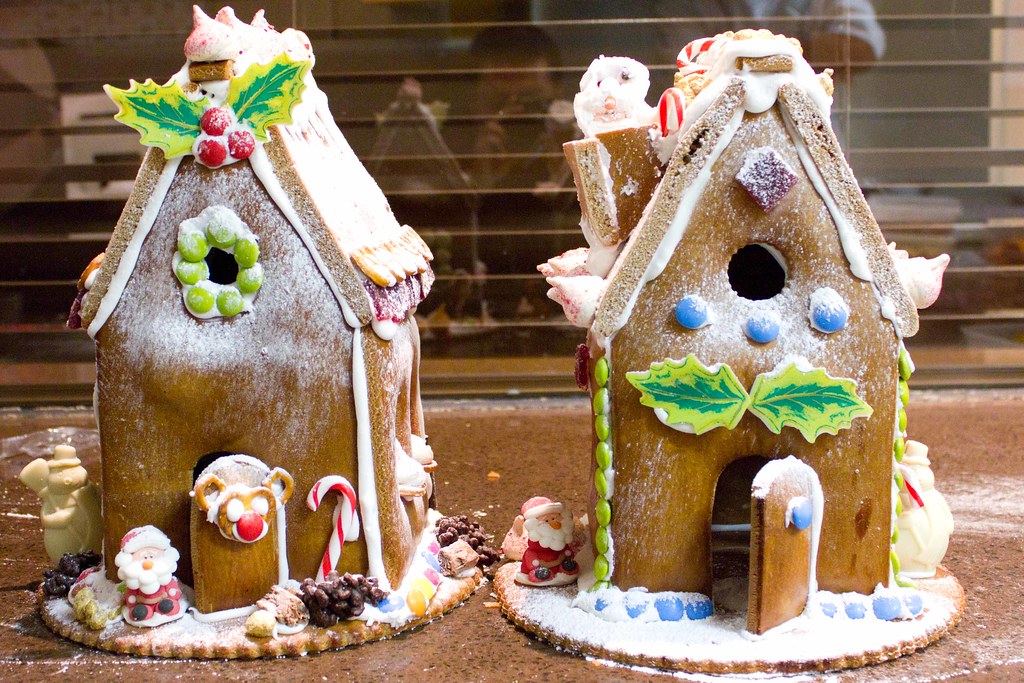
We both finished our houses and were extremely pleased with them. Michele's is on the left and mine's on the rights. Who's cuisine, I mean Gingerbread House, reigns SUPREME????????? Just because Michele's blog is called Iron Chef Shellie doesn't mean that I will lose this battle. I will fight for the honour of my baking tribe, the Geeky Engineer's Baking Society of Melbourne and win this contest. Please vote in the comments below. If you vote 1 for Thanh Do, you're voting for more stroopwafels and banana bread for all.

Whilst our Gingerbread Houses are awesome, unfortunately you can't have them. You can get the next best thing, which is a Gingerbread House from Cacao for this Christmas. They're nice, but obviously nowhere as nice as mine. :-)

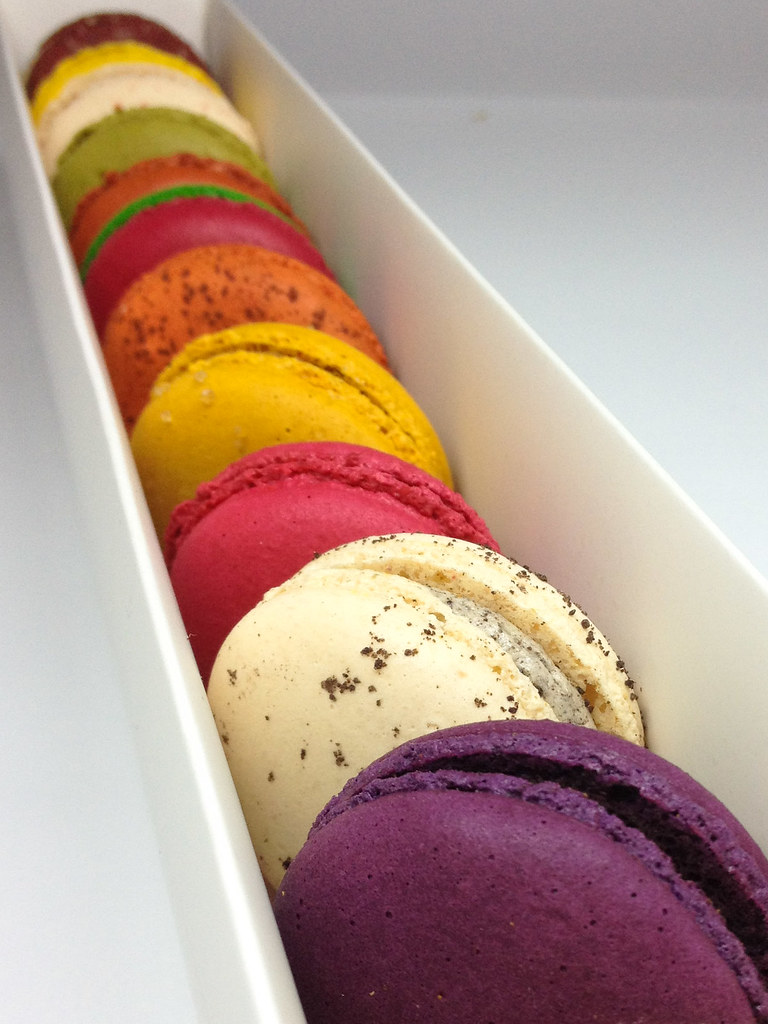
While we waited for our icing to set, we tucked into some macarons. I know that Cacao does macarons but for whatever reason, I've never come to buy them before. I've bought their chocolates but not the macarons. Utter total incomprehensible monumental failure on my part. The macarons are delicious. On the night we sampled the Violet and Blackcurrant and Jingle Bells. I'm obsessed with violet flavours in desserts and have been trying to hunt down the essence everywhere for a while now. Well, I may have found a secret supplier in Tim (hint hint Tim). Violet is so under-utilised in desserts in Melbourne. The French use it in a lot of their cakes and it works wonderfully. This macaron was no exception as it combined perfectly with the blackcurrant. Violet tastes less floral (and less like toilet freshener) compared to lavender, which I don't like too much. The Jingle Bell macaron is a special for Christmas and contains crushed-up Christmas pudding with rum toffee in a vanilla buttercream. Yummo. Tastes so Christmassy (not a real word, put down your keyboards word Nazis).

We also got the pleasure of taking home a big box of Cacao macarons. So far I've eaten two, the Strawberry and Cream (simple and delicious) and the Pistachio (OMFG awesome). The pistachio is the best I've tasted anywhere in Melbourne. The flavours are so true to pistachio and you can taste the nuts rather than that faux flavour which I hate.

Lastly, we also got a jar of the Salted Caramel Spread. I've made my own Salted Caramel Spread (recipe to come in a separate blog post) as it's all the rage nowadays. My salted caramel spread is rather awesome already (photo below), but Cacao take their salted caramel spread to another level. They use fleur de sel instead of regular salt and add some chocolate into the mix, giving it a richness and extra fragrance my spread doesn't have. Looks like I need to experiment with my salted caramel to raise it to another level.

That my friends, concludes a very enjoyable journey into various Christmas treats. Obviously, there aren't many days left to Christmas, so you better haul a$$ to Cacao to stock up on the really important items like chocolates, macarons, gingerbread houses and that salted caramel spread. What's Christmas going to be like at your house without these essentials eh, a sad boring party of nothingness (unsure if that's a real word, please confirm). I will be eating my delicious treats and Instagramming it for you to see otherwise muahahaha (evil dictator laugh).

Gingerbread Recipe

This recipe has been kindly given by Tim Clark from Cacao. It should be enough to make a fairly decent sized house.

INGREDIENTS
Water 30g
Sugar 75g
Honey 50g
Glucose 25g
Golden Syrup 25g
Flour 300g
Baking Powder 5g
Baking Soda 2g
freshly ground mixed spice 5g
Eggs 40g

METHOD
1. Warm the Water, Sugar, Honey, Glucose and Golden Syrup in a sauecepan
2. Add the warm liquid with the eggs and whisk to combine and add to the dry ingredients and mix well until mixture forms a dough either by hand or with a mixer fitted with a paddle or dough hook.
3. Cover dough and let rest in the fridge for 24hrs
4. Next day roll the Gingerbread out to 4mm in thickness and cut to desired shapes
5. Let rest for 30 minutes before brushing wish egg yolk
6. Bake in oven @ 180C for 12 to 14 min.
7. Decorate to your heart's desire.

Sunday, December 02, 2012

Molasses Cake With Cooked Cream Cheese Frosting Recipe

I read about this cake molasses cake on Agne's blog, Off The Spork. I've never eaten a molasses cake before so was really intrigued. It seems like one of those "olden days" ingredients used in eras past, at least from my knowledge of eras past through American movies haha. I don't claim to be a food historian. Anyway, Agnes raved about this cake and said I had to give it a try. I was hesitant as she described the cake as having liquorice tones, and I hate liquorice. But she said the liquorice flavours really worked so off I went to bake it.

I baked the cake, and used a smaller tin than prescribed as Agnes suggested and the cake came out nice and tall. I found the molasses in the health section of my supermarket. The molasses on it's own smells and taste really strong and not that nice. But once in the cake, it gives it this burnt liquoricey flavour that is awesome. This cake is huge and uses about 3/4 of the jar of molasses. It's a bit annoying as I don't know what to do with the remaining molasses. Maybe I can just add less of it in the next cake.

Along with the molasses, this cake also uses a cooked cream cheese frosting. I've never made that either and again wasn't sure how it would turn out. I thought it would be a bit like a white frosting where you make a flour paste, and I don't really like white frostings. However, this frosting turned out amazing. It's basically like a traditional cream cheese frosting but super duper smooth and creamy. I've usually made this version of a cream cheese frosting for all my cakes now. It is far more effort than the usual cream cheese frosting but the smooth texture is worth it.

With this cake, I decided to try and decorate it a bit nicer than usual so opted to use some toasted almonds on the outside and some flowers to decorate it. The almonds work nicely with the cake actually so I'd recommend using it if you can be bothered.

As usual, I like to try and provide some tips on the bake itself
-As Agnes suggested, a small pan does produce a nice high cake that looks better. It did take a bit longer to bake so just watch the cake in the oven.

-The quantity of molasses seems excessive but trust the recipe. It does work and the sweetness is ok. It is verging on the sweeter side so just make your cream cheese frosting a little less sweet.

-The cake has a salty taste which I do love. If you don't like that saltiness, I guess you can omit the salt, but I wouldn't recommend it.

-For the cream cheese frosting, keep whisking the flour paste until it's very smooth and quite a thick paste. You really have to beat it until it's quite cool or the cream cheese will melt into a mess when you beat it in.

-Before you ice the cake, make sure the cake has totally cooled down or the frosting does slide. The cake is really big and retains a lot of heat in the middle so just feel it to be sure it's cool.

Molasses cake with cooked cream cheese frosting

Adapted and converted to metric from The Kitchn
Serves 10

INGREDIENTS
170g unsalted butter, roughly chopped
340g (1&1/2 cups) unsulphured dark or unsulphured blackstrap molasses
150g brown sugar
75g caster sugar
2 teaspoons instant coffee (optional)
410g plain flour
1/2 teaspoon fine salt
2 1/2 teaspoons baking soda
2 teaspoons ground ginger
1/2 teaspoon cinnamon
1 teaspoon vanilla
2 large eggs, beaten
360ml full cream milk

METHOD
Heat the oven to 175°C. Lightly grease a 23cm/9-inch springform cake pan (the original recipe stated a 25cm/10-inch pan, but I found it to be a bit flat. I’d recommend slightly smaller).

Place the butter, molasses, instant coffee (if using) and sugar into a medium sized sauce pan over medium heat. Stir until the butter melts and the sugar has dissolved. Take off the heat and set aside to cool.

Sift together the flour, baking soda, ginger and cinnamon into a large bowl. Add the salt.

Whisk the vanilla, eggs and milk into the molasses and butter mixture to completely combine. Pour this liquid slowly into the bowl of dry ingredients and whisk to combine, making sure there are no lumps.

Pour the batter into your prepared cake tin and bake at 175°C for 45-50 minutes or until a skewer inserted into the middle of the cake comes out clean (if using a smaller pan, your cake may take slightly larger).

Let it cool and then run a knife around the inside of the pan to release the cake edges. Remove from the tin and place on a wire rack to cool completely being icing.

Cooked cream cheese frosting

INGREDIENTS
250g full fat cream cheese, softened at room temperature for at least 1 hour
15g plain flour
110g caster sugar
pinch of salt
125ml (1/2 cup) full cream milk
1 teaspoon vanilla

METHOD
Place the soft cream cheese in the bowl of an electric mixer. Beat on high speed for several minutes until smooth and silky. Scrape out into a separate bowl and set aside.

In a small saucepan, whisk together the flour, sugar and salt. Turn the heat on to medium and slowly add the milk, whisking constantly, until it comes together in a small paste.

Whisk continuously as it comes up to simmer. It will start to thicken – keep whisking and let it simmer for a minute to thicken and turn off the heat. Scrape the flour/milk paste into your mixer bowl and turn on the mixer to whisk it on low speed for about ten minutes, or until lukewarm or cooler.

Slowly add the cream cheese and vanilla, whipping constantly. Continue whipping until it is completely combined and smooth and silky. If necessary, put the icing in the fridge for a bit to firm up before icing the cake.

Spread over the cold cake, decorate with nuts if desired, and keep the iced cake in the fridge.