Skyscraper

Friday, November 28, 2008

Adelaide Day 4 - Haigh's, Central Markets, Mt Lofty

So following on from our thrid day in Adelaide, it was our final day.

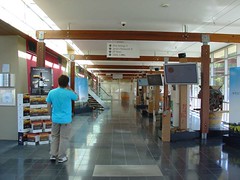
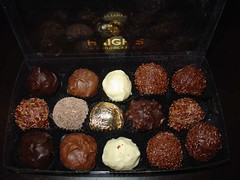
We started off the day with a visit to the Haigh's Visitor Centre. We had already visited the shop on Rundle Mall on day 2. This time, we had booked in for a tour of the Haigh's factory. The tour was extremely interesting, hearing about the Haigh's family owned business and seeing how things worked. Most of the processes in Haigh's chocolate is still hand made and the guide kept repeating that they make their own chocolates from the cocoa bean stage. There was also lots of free samples to keep us happy.


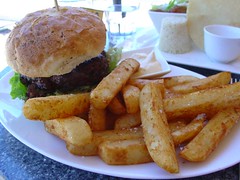
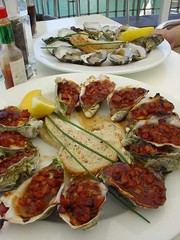
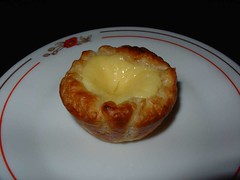
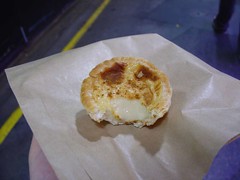
Next it was on to Central Markets. The market had lots of produce that I wanted to gobble up. I tucked into a few things, one of which was a Portuguese tart from Dough...


The Portuguese tart cost a whopping $3 each. But I had to try it out just to see how good it was. It turned out I should have saved my $3 to buy lottery instead. The tart was foul. The pastry was so soggy and tasted partially uncooked. It was more a shortcrust (if you can call it that) pastry rather than a puff pastry. The custard part was also very bad. It was all wobbly and had a really bad taste. It was more the consistency of a lemon tart rather than a custard tart. I make better Portuguese tarts myself and $3 would have made about 6.


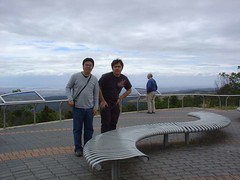
After the markets, we grabbed a quick lunch at one of the food court shops and then headed off to Mount Lofty. The mountain gave a great view of Adelaide. The day was quite cloudy so it was hard to make out everything but we could definitely see Adelaide.


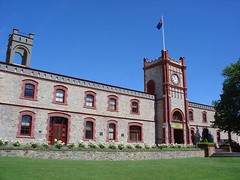
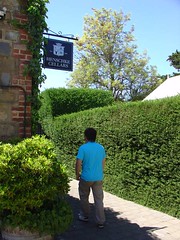
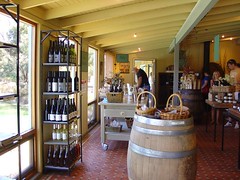
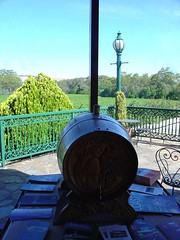
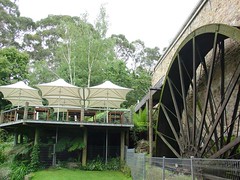
Finally, as we left Adelaide and waved goodbye, we stopped by one last winery. We stopped at Petaluma and Bridgewater Mill. The water wheel was so ancient looking. The restaurant inside was also really weird, with seating around an arena style on multi levels. The wines were ok but nothing really caught our fancy so we bid them farewell and headed off home.


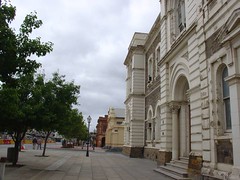
After a tiring, intoxicated, relaxing, scenic, intoxicated, educating, indulgent, intoxicated four days at Adelaide, we managed to each buy back a stack of good wine. I thought Adelaide would be a big bore but I actually liked it. It's not as fast paced as Melbourne and Sydney, but not dead quiet like Tasmania. It's sort of like Queensland but with style. I loved all the buildings, especially the churches. And would you believe it, despite seeing so many churches, I never had an opportunities to get a good photo of a few even. The slow traffic speed of 60 on the large main roads also set this mood of everything being relaxed. But there was still enough people around to not feel like an isolated place. I would go back to Adelaide again to visit more wine regions and visit the city again.

Adelaide Day 3 - Barossa Valley

After a day of rest, it was back onto the wine tour. This time, we went to South Australia's and probably Australia's most famous wine region, the Barossa Valley.

Being such a famous area, we tried to visit as many wineries as we could that day. We went to the following places.
Yalumba
Henschke
Penfold's
Maggie Beer's Farm House
Torbreck
Barossa Valley Estate
Rockford
Grant Burge
Jacob's Creek


Yalumba


Henschke


Penfold's


Maggie Beer's


An inquisitive peacock that walked right up to me.


Torbreck


Barossa Valley Estate


Rockford


Grant Burge


Jacob's Creek


The Barossa Valley wineries definitely are spectacular in terms of appearance. Probably the most spectacular that we saw all day was Yalumba. That huge ancient castle like building is just a beautiful sight.

The Henschke, Torbreck and Rockford cellars were all tiny but full of character, Rockford in particular. There were cobwebs in the Rockford cellar, such is the authenticity of the building's age.

Maggie Beer's Farm House was the most interesting with a very calming view of the pond. It was also interesting to walk around outside and look at the pheasants.

The larger cellar doors in Penfold's, Grant Burg and particularly Jacob's Creek were more commercial in feel. That didn't necessarily translate to a lesser experience, just that it didn't look as good.

In terms of wines, I would say that I really liked Penfold's, Torbreck and Grant Burge. You could try a lot of wines at those places and the staff were all very helpful in explaining things and making suggestions. We had a great talk with the lady (forgot to get her name) at Torbreck, who told us all about their wines and also about other wines in the region. She even suggested some other wineries that we should visit.

A Canadian guy we met in McLaren Vale was telling us how most of the wines in the Barossa region really aren't even from that region. I kept that in mind and asked at every winery where their grapes were from. It did turn out that they all used multi regional grapes from all over SA. This isn't to say that the Barossa wines are bad, far from it, but it doesn't truly represent the region if that's what you're after. There wasn't one winery that got their grapes exclusively from the Barossa region.

For lunch, we stopped at a place called The Branch in Nuriootpa. I got the Beef Burger, which was quite good. I like the chips with the aioli.


Dinner was at a Korean BBQ Buffet on Gouger Street. I was expecting the worse as buffets are so rarely good, but to my surprise, most of the meat there was actually fresh and tasted good. I would recommend going there.

Adelaide Day 2 - Port Adelaide, Glenlg, Botanic Gardens

Following on from day 1's winery tour, Dennis and I thought we would take a break from the wines and visit some towns.

First stop was to Port Adelaide. From the Lonely Planet book, it sounded like there was a lot more to do at Port Adelaide than there really was. Most of the activities in Port Adelaide involved going from one old historic building to another. That's good and all if you're into that type of stuff, but it can get a bit similar after the first few buildings. The whole area was really quiet and there didn't seem to be much activity around.


We visited the Sunday market where a lot of trash and treasures were being sold. We were really tempted to take a ferry ride around the bay but due to time, we opted not to. Instead, we went and visited the Aviation Museum. There were many restored planes and the history of their involvement in various wars. It was very interesting to see these old planes close up. I can't believe how small the pilot area were in some of the planes.


After the aviation museum, it was time to leave Port Adelaide and visit the glitzier Glenlg. This place was much more to my liking. The main marina was a beautiful expanse of boardwalks, with many fancy looking yachts parked close to it. The view from the marina was very beautiful, picture perfect.


We stopped at The Oyster Bar to have some Coffin Bay oysters. As good as the Kilpatrick ones were, the natural ones were just outstanding. These oysters had so much flavour. An oyster may be freshly shucked, but can still taste rather dull. These though were so packed with flavour that I could have eaten another two dozen. Eating the saltiness in the oyster reminded me of the previous day's lunch at Penny's Hill. An elderly gentlemen on the next table replied to the waiter's enquiry of how his lunch was going that he didn't like the saltiness in the oysters. The waiter told him that they oysters were freshly shucked. The gentlement then asked the waiter if the chef added any salt or soaked the oysters in saline solution. I'd never heard of soaking oysters in saline solution. What would that achieve? Anyway, when the waiter left, the gentlemen preceeded to tell his wife that sometimes restaurants do that, they soak the oysters in saline solution to preserve them for longer. Is this complete bull dust or is there any truth in it? Anyway, I like the saltiness in oysters, that's what makes them what they are.


After a walk around Glenlg and the beach, it was off to lunch at Good Life Organic Pizza. The surroundings were a tad dark and felt a touch uncomfortable. You would think they would put more windows with such a great view outside.


We ordered the Salami pizza to share. The pizza was very good. The base was a thin crispy base instead of those solid thick Pizza Hut things. The salami was hot, the way I like, and olives, cheese and basil finished off a simple pizza.


After lunch, we were slowly wandering back to the car when both Dennis and I turned our heads quickly at a kid running past. The kid was holding an ice cream that looked like a McDonald's soft serve, but with chocolate bits in it. We were really curious so went inside the Maccas. As it turns out, there is a chocolate vanilla soft serve called a choc swirl. Of course we had to try one, having never seen them before. We thought it was something that they have in Adelaide. But as it turns out, no other Maccas that we went to after that had it. Must only be available in Glenlg. They really are a posh bunch there, having their own soft serve style.


Last stop for the day was the Botanic Gardens. The gardens were nice, but I would say the Melbourne Botanic Gardens are better. I liked this glass sculpture a lot.


This vine archway made me think of movies for some reason. Yet if you forced me to name a movie where they actually had an arch like this, I couldn't name one. Can you name any movie with an archway in it?


Dinner was again at another totally forgettable place. It was so forgettable that I actually have forgotten the name. They served dumplings though, and there was the word Noodle in it because I remember the wait staff aprons had that word on it.

After dinner, we visited the Cas(h)ino. C'mon, we're two Asians. Gambling is in our genes, hehehe. The casino is so much smaller than Melbourne. Crown really is huge. It's amazing this town is able to support such a large casino. We really must love gambling in Melbourne. Anyway, like most other buildings in Adelaide, the casino was a historic looking thing and looked and felt very refined. That's one thing I liked about Adelaide. I loved how the buildings were all different and not boring. It added to the charm of the place.

Thursday, November 13, 2008

Adelaide - Dining Recommendations?

I'm travelling to Adelaide as well as Barossa Valley and McClaren Vale this weekend (Friday night onwards). Can you suggest any dining options in or near those areas? Or any must try places where I can make a detour specifically for?

EDIT: I remember reading Matt from Abstract Gourmet's trip to Adelaide.

Suggestions from readers
Adelaide
McClaren Vale
Barossa Valley

I've since re-read it all and there are heaps of tips there. If you have any more suggestions, please let me know.

So far I'm thinking of going to the following places

*Goodlife Organic Pizza, Glenelg
*Penny's Hill Restaurant, McClaren Vale
*Mesa Lunga, Adelaide
*Melting Pot, Hyde Park

Sunday, November 09, 2008

Portuguese Custard Tarts

I have always loved Portuguese Custard Tarts. I think I first tasted a Portuguese custard tart on my holiday in Hong Kong. When I got back to Melbourne, I managed to find them on sale at Carrington Cake Shop in Box Hill. But they only sold them on Saturdays and even then they only made two trays. Hence you had to be extremely early and I like to sleep in on Saturdays.

When Duncan from Syrup and Tang said that he was developing a recipe, I asked him if he could email it to me when he was done. He did so and I've made them twice already. Duncan has since posted the recipe, so you can go find it here.

So here are my lovely tarts.


Here's some observations and tips.

* The custard with the lemon and cinnamon flavouring is really nice. The texture of the custard also turned out well if you don't overcook it.

* Don't sacrifice taste for the sake of looks. I tried to get those nice brown spots the first time and in doing so, burnt a lot of the pastry and also curdled the custard.

* Using two muffin pans stacked on top of each other gave a really good result with no burnt pastry bases. The burnt parts you can see in the photo above is when I spilt custard mixture on the pastry. Be very careful when pouring in the custard mixture into the pastry. If you spill some, it will burn and also cause the pastry to stick to the muffin pan.

* When pressing the pastry into the muffin pans, make sure to really flatten out the pastry on the base. An air pockets created between the pastry and the pan will cause the puff to really rise and push all the custard up and out, spilling the custard over the sides so your tarts look like Quasimodo.

* Don't overfill your pastry with custard mixture. Overfilling will cause the tarts to again look like Quasimodo.

* I used store bought pastry and it's not bad. But it's definitely not as flaky as the tarts that I have tasted before. I'm too lazy to make my own puff, so will continue to use the store bought stuff. It still tastes very good, but if you want excellent, make your own puff pastry.

* I turned the oven to 250C (as high as it will go) with no fan and place the tarts to bake in the top shelf. I found that 15 minutes was about right to get it to the state that you see above. I could probably bake them a bit longer to get a slightly crisper pastry and firmer custard.

So what are you waiting for. Get cracking and make these tarts. They're delicious and quite easy (if you buy the puff pastry). Then you can satisfy your Portuguese Custard Tart cravings and eat as many as you like.

Cherry Slice Experiment

Cindy over at Where's The Beef has been undertaking a Cherry Slice Experiment. Since I do testing for my job, I thought I would get in on the act as well. Plus it looked too delicious not to give it a try myself. So far, Cindy has tried various types of cherries (dried, glace, jam, preserved) and also soaking them in different syrups (sugar, apple juice, black cherry syrup).

Initially, I was going to start tinkering with the various aspects of this recipe as well, but then decided that I should make the original recipe first to get a control sample (any sound scientific experiment must have a control) and know how it actually tastes and which aspects I like or dislike. The original recipe is from Wanting Kneading.

So what did I like or dislike about the original cherry slice? I actually really like glace cherries. I can put them on anything and like the sickly sweet flavour of them. So I found the glace cherries in this recipe really to my liking. The coconut is the base of the recipe, so that really can't be changed. The chocolate topping with the coconut cream was nice, but I might try it using just chocolate so you get a more crisp and bitter topping. The base, like Cindy, I found too crumbly and rather overpowering in flavour. I didn't like it too much. I made this Baked Cherry Cheesecake previously where I loved both the base and the canned cherries which I boiled in a honey syrup, so that will be my next experimental starting point.

So here are the variations I think I will attempt next time.

Glace cherry mixture + Oatmeal almond base from the baked cherry cheesecake
Canned cherry in honey syrup mixture + Oatmeal almond base
Rum soaked raisins + Oatmeal almond base

Pure dark chocolate topping.

I might try a chocolate ganache topping the next time after, if I'm not sick of cherry slices by then.


Cherry Ripe Slice
Adapted from Wanting Kneading blog so it is no longer a vegan recipe

For the base:
150 g butter
1/2 cup brown sugar
1 1/2 cups plain flour
1 tsp baking powder

For the filling:
1/4 cup water
2 tbsp caster sugar
1/4 tsp agar agar powder (or gelatin powder works fine)
1/2 270mL tin pure coconut cream (no added water or preservatives etc)
200 g glace cherries
3 cups dessicated coconut

For the topping
100 g dark chocolate
the other half can coconut cream

Base:
1) In a big mixing bowl, blend the butter and sugar together with electric mixer, and make sure all the clumps of sugar are not clumps anymore.

2) Sift the flour and baking powder over the top of the butter/sugar mix.
Mix this together well until crumbly.

3) Press the mixture very firmly and evenly into slice tin lined with baking paper.
Bake at 180C for about 15 minutes, or until golden brown.

Filling:
1) In the smallest saucepan you have, put the water, sugar and agar powder. Leave while you get the rest of the filling ready.

2) Chop the glace cherries roughly and mix in a big mixing bowl together with the coconut cream and coconut.

3) Put the saucepan with the agar and water and sugar on the stove, and bring to the boil, covered. Simmer for about 5 minutes, covered, stirring every now and then to incorporate the sugar and agar from the sides of the pan.

4) Pour over the glace cherry mixture and mix well. With slightly wet hands pack this mix firmly and evenly onto the biscuit base. Place in the refrigerator while you prepare the topping.

Topping:
1) Melt the chocolate gently in a double boiler. Carefully and slowly stir in the coconut cream.

2) Pour evenly over the top of the slice, and spread with a spatula. Chill in the fridge for at least an hour before slicing into small pieces.

Haigh's Chocolate Truffles

I really really love eating chocolates, so friends and work mates are always giving me chocolates for presents. Kin and Jo brought over a box of Haigh's Chocolate Truffles for me when I had an impromptu dinner party.

Here are the beauties in their box. I have since munched through half the box and can say that the truffles are very good. They have an assortment of centres, with rum flavoured, coffee flavoured, orange liqueured flavoured, dark chocolate, milk chocolate centres. My favourite would actually be the white chocolate one with the orange flavoured liqueur.

If you can't afford bought truffles, you can easily make them yourself. I made a batch before and it was really good. You can also then control what flavours you put into them. You can find the recipe here.

Mango and Coconut Friands

I had been meaning to make friands for a while. When I saw these very cute looking friands that Agnes made, I decided to give them a try.

I had meant to make berry and coconut friands like the ones Agnes made, but when I came to make them, I discovered that I had used up all the frozen berries. So necessity being the mother of invention, I instead grabbed some mangoes from the fruit bowl and used that instead. I know that mango and coconut go well together as many Asian desserts use that combination of flavours.

The friands were very moist and moorish. The coconut was the dominant flavour but when you reached the centre, the mango had softened to a custard like consistency and provided a burst of flavour and slight sourness, perfect.


Mango and Coconut Friands

INGREDIENTS
125g unsalted butter
1/2 cup self-raising flour
1 2/3 cups icing sugar
1/2 teaspoon baking power
1/2 cup ground almonds
3/4 cup fine desiccated coconut
5 large egg whites
oil for greasing
mango pieces
icing sugar to serve

METHOD
1) Preheat the oven to 175C.

2) Melt the butter and leave to cool until just warm.

3) Sift together the flour, icing sugar and baking powder, then stir in the ground almonds and coconut.

4) Whisk the egg whites until fluffy but not stiff.

5) Fold into the dry ingredients then fold in the melted butter and set the mixture aside for 10 minutes.

6) Spray or brush friand moulds with oil. Pour the mixture in, add a couple of pieces of mango and bake for 20 minutes.

7) Cool on a rack before tipping out on the moulds. Dust with icing sugar.

Mocha Fingers

When I saw the photo of these Mocha Fingers in the Women's Weekly Bake book, I just had to make them. The chocolate cream oozing out of the two sandwiched chocolate biscuits just looked so tempting for this chocolate fan.

Having made them, I don't think I'll ever make them again. They were so tedious to make. As good as the biscuits look, they took so long and my patience was really wearing thin by the third hour (I made a double batch) when I had to keep taking the dough in and out of the fridge as it softened really quickly.

These biscuits taste ok, but weren't spectacular. The biscuit base had a nice mocha flavour to it and was ok on it's own. I thought the mocha custard would really lift the biscuit, but it didn't really work that well. These biscuits look fantastic as a gift as presented in the book stacked inside a clear container with a bow around the container. However, just as a biscuit to eat, it is too much effort for not enough reward for me.


Mocha Fingers
From Women's Weekly Bake
One batch makes 25 sandwiched biscuits

INGREDIENTS
1 tsp instant coffee
2 tsp boiling water
125g butter, softened
3/4 cup firmly packed brown sugar
1 egg
1 1/2 cup plain flour
1/4 self-raising flour
1/2 cup cocoa powder
75g roasted coffee beans

MOCHA CUSTARD
2 tbsp custard powder
2 tbsp caster sugar
60g dark chocolate roughly chopped
1 cup milk
1 tbsp coffee-flavoured liqueur

METHDO
1) Blend coffee water. Beat butter, sugar and egg until combined. Stir in coffee mixture, sifted flours and cocoa in two batches.

2) Knead dough on floured surface until smooth. Roll dough between sheets of baking paper until 4mm thick. Cover and refrigerate for 30 minutes.

3) Preheat oven to 160C. Grease oven trays and line with baking paper.

4) Make mocha custard.

5) Cut 8.5cm squares from dough. Halve squares to make 50 rectangles. Place on oven tray and press three coffee beans into every second rectangle.

6) Bake for about 12 minutes. Cool on wire racks. Spread custard over plain biscuits and top with coffee bean biscuit.

MOCHA CUSTARD METHOD
Blend custard powder, sugar and chocolate with milk in a small saucepan. Stir over heat until mixture boils and thickens. Remove from heat, stir in liqueur. Cover surface with plastic wrap and refrigerate until cold.