Skyscraper

Friday, December 20, 2013

Lune Croissanterie - Best Croissants In Melbourne

1/29-31 Scott St
Elwood, VIC 3184
03 9077 6463
Website
Twitter

Let me tell you a story, a story of how I came to find the best croissants in Melbourne. It all started in a galaxy far far away, known as the Melbourne CBD (I work and live in the 'burbs). One fashionable, funny and famous coffee addict called I-Hua frequently visits Patricia Coffee Brewers for her daily caffeine fix. The non-cake eating I-Hua would usually just have her coffee, but she noticed these pastries (which aren't cake as she doesn't eat cake so let's get that clear), espeically the pain au chocolat from Lune Croissanterie. She tried one, and loved it. From that point on, she tried numerous other things, so much so that she became friends with the genius behind the pastries, Kate.

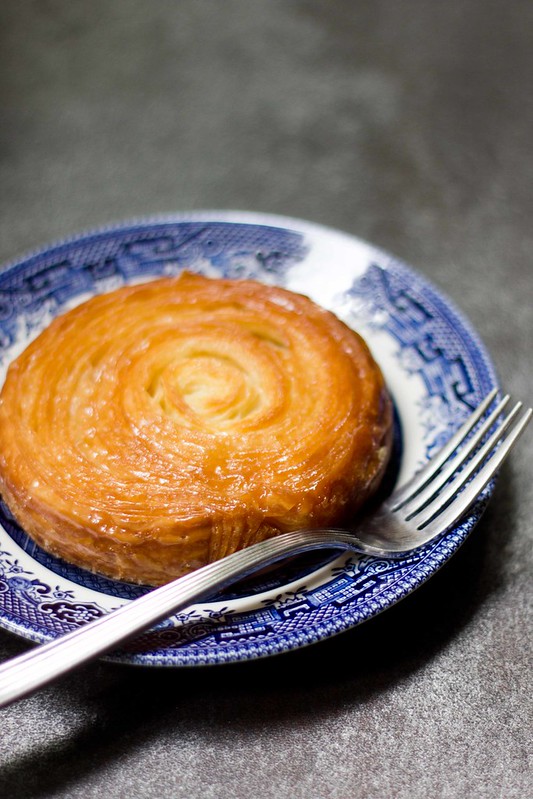
Fast forward months and I-Hua, Aaron, Daisy, Ricky, Bryan and myself were going to dinner at Dainty Sichuan after our reverse dinner meal which started with dessert at http://luxbite.com.au/. Kate had joined us for the dinner part at Dainty as she loves spicy food too. By chance, I was sitting next to Kate and we talked about pastries and cakes. I asked her about some pastry I had in Paris that was like puff pastry but with a sugary outside. She told me it might be a Kouign Amann, a pastry that originated from a region in France. Then I asked if that's what the Dominique Ansel pastry I had in New York was. And she confirmed that was the case. I had absolutely loved those two pastries and the most amazing part of this story is that Kate was starting to make them. OMG. SHUT THE GATE. GET OUTTA HERE. I was beyond excited. A special meeting was setup and Daisy and I drove to Kate's shop to pick up this Kouign Amann, amongst other pastries. The Kouign Amann is mind blowingly awesome. The taste is so simple yet so perfect and just lingers on your tongue like a soft Autumn breeze on your face.....*licks lips*. Ok that's what Nigella would have said. I'll be a bit less poetic and say that the sugar on the outside works so well with the buttery pastry to give the most wonderful simple flavour. There are a number of textures too, from the sugar crunch, to the pastry crunch and the soft interior of the pastry. I've always loved simpler desserts and this is exactly my type of thing. Now I don't need to go to Paris or New York to eat one. The Kouign Amann is my favourite dessert of 2013. And if I have anything to do with it, next year in 2014, the Kouign Amann will become the next big thing as everyone should taste this amazing pastry.

Besides the Kouign Amann, Kate also makes plain croissants, almond croissants, pain au chocolate, cruffins (a croissant muffin) and special flavours of things such as pistachio croissants or anything else she feels like making. I've had the pleasure of eating all of her pastries. The plain croissants are beautiful, the best I've tried in Melbourne. They're flakey, crunchy, soft, buttery. Everything you want in a croissant. The almond croissant has also become my favourite almond croissant. Upon my very first tasting, I felt that I still preferred the Parisian Patisserie almond croissant. However, upon more tries of Kate's almond croissant, I prefer the crunchier texture (Parisian's is more like a squashed brioche and very strong in almond flavour) and the hint of orange in Kate's almond croissant. The orange is not for everyone, with a few others telling me it really puts them off it, so if you don't like orange in things, you may want to avoid the almond croissant as you'll really taste the orange. For me, the orange is what makes the almond croissant so beautiful. The pain au chocolat is also very good, but I'm strangely not a massive fan of chocolate in pastries. Be warned again that Kate puts smaller amounts of chocolate in her pain au chocolat like they make in Paris as it's "all about the pastry" and not overloading it with chocolate. So if this is not your thing, go to Noisette or Brunetti's for a more chocolate filled pain au chocolat. Lastly, we get to the cruffin. What a stroke of genius. It's croissant pastry cooked in a muffin tin. It's not just a gimmick as this method of cooking give it different textures and flavours as different parts crisp up. Kate fills the cruffins with a variety of flavours, with jam donut, nutella four ways, lemon curd and raspberry and peanut butter and jam some of the flavours she's done so far. I've tried two flavours and they're excellent.

When I first met Kate she was selling her pastries through other vendors, but now she has her own shop, so you can pop down and buy some directly from her and have a chat. At the moment, Lune Croissanterie is opened on weekends only, but check out her website and Twitter for regular updates. I urge you to get yourself to the shop and buy everything as the croissants are so good, especially that Kouign Amann.
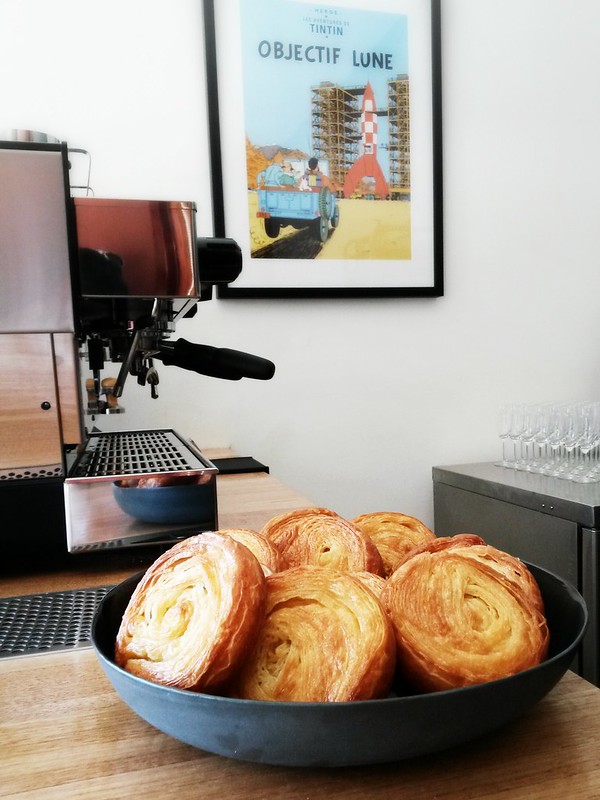
The Lune Croissanterie serving window, with the Tin Tin poster that inspired the name.

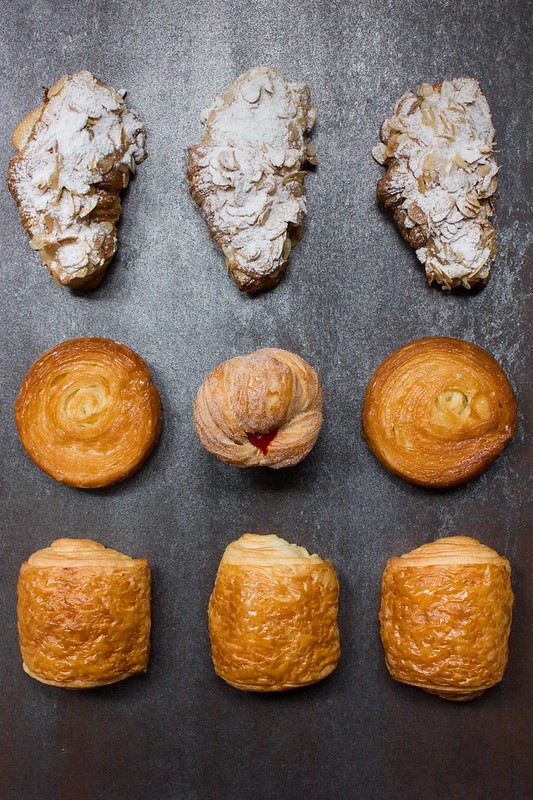
An army of pastries, almond croissants, Kouign Amann, cruffin and pain au chocolate.

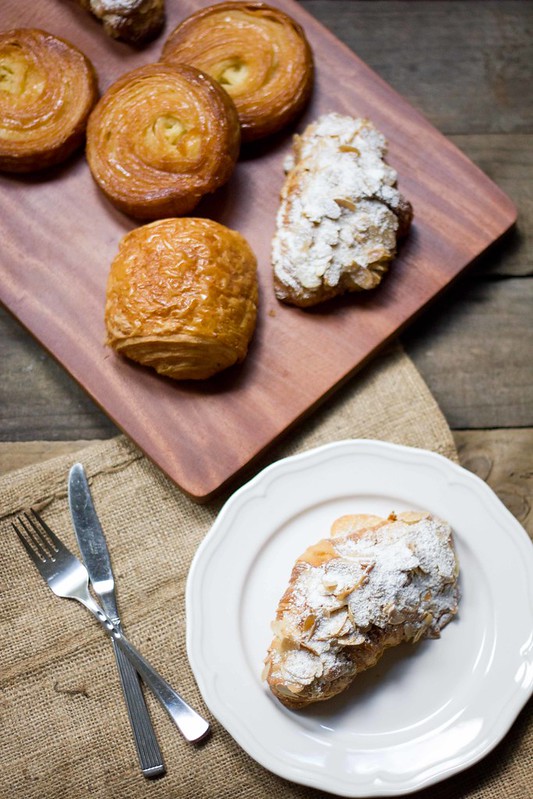
The almond croissant is really tasty, without that fake almond flavour.

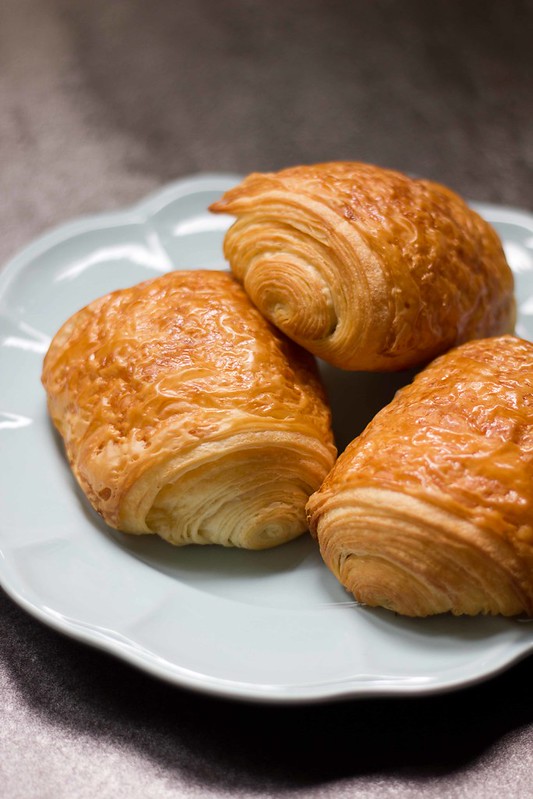
Pain au chocolat, with a small amount of nice chocolate inside.

Jam donut cruffin is as awesome as it sounds.

The super amazing Kouign Amann. I can't get enough of them.

Lastly, here is an awesome super hilarious parody of the Downfall movie that is all about Lune Croissanterie. You can find out about Kate's past career as an aerospace engineer and how she gave all that up for the love of pastry.


Lune Croissanterie on Urbanspoon

Sunday, December 15, 2013

Wine Food Farmgate in Mornington Peninusla + Giveaway Cherry Picking Experience

I really loved the Mornington Peninsula area, so when I was invited to try the new Wine Food Farmgate trails that the area has just implemented, I quickly accepted. It was such a great adventure as I got to go on the trip with Michele, Michelle, Agnes, Alastair, I-Hua, Aaron and Adrian.
I was invited by Q Stategies and dined and stayed courtesy of the businesses mentioned in this post.

The Wine Food Farmgate initiative brings together most of the producers, restaurants, wineries in the Mornington Peninsula area to provide you, the explorer, with an experience that will delight your senses as I found out. Basically, you can buy a trail kit and then work out all the places you want to go and plan an itinerary, collecting food and wine and eating on each stop.

In our two day trip, I visited and tried the following things:
Yabby Lake Winery
Green Olive at Red Hill Vineyard
2 Macs Farm
Red Hill Cherry Farm
Mornington Prime Cuts
Max's Retreat at Red Hill Estate
Somers General Store
Sunny Ridge Strawberry Farm
Mornington Peninsula Brewery


Check out the other posts about this trip
Agnes' post
I-Hua's post

The first stop on the trip which we all experienced was lunch at Yabby Lake Winery. The winery has been around since the 1980s and is owned by the Kirby family. The kids loved yabbies so hence the name. And yes, I did ask, there are yabbies in the ponds on the vineyard. The winery is famous for their Pinots and Chardonnays as the soils in the are suit those varieties. We sampled a number of Pinot Gris, Chardonnays and Pinot Noir to match our lunch. I really enjoyed all the wines, especially the Pinot Noirs.

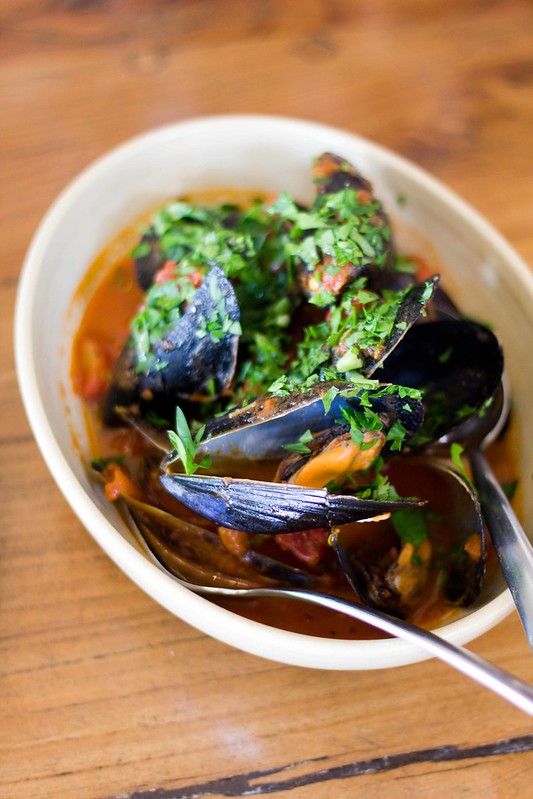
For lunch, we shared a number of entrees, mains and desserts. Entrees of duck and rabbit terrine was good, as was the antipasto platter. I really loved the white anchovies in the antipasto platter. However, my favourite entree was the mussels caught fresh that day from Dromana. They were so sweet and the tomato sauce was excellent. It was a hot item as we went to order another serve and it was all gone. So if they have it as a special, I'd highly recommend you order it quickly.

For mains, we shared a Lamb Tagine, Spanish Rice, Sanganaki and Cottage Pie. All dishes were good, but surprisingly I really loved the Cottage Pie the most. A good filling with soft potato topping.

Desserts was my favourite course for good reason. The fig and cinnamon cake with Persian fairy floss was really good. I love both the flavour and texture. The raspberry and white chocolate muffin was also really moreish. The Chin Chin dessert of meringue with honeycomb and ice cream wasn't too bad, but the highlight was surprisingly the rice pudding. It was stunning. The texture wasn't gluggy as I was expecting and the syrup and fruits worked so well in it.

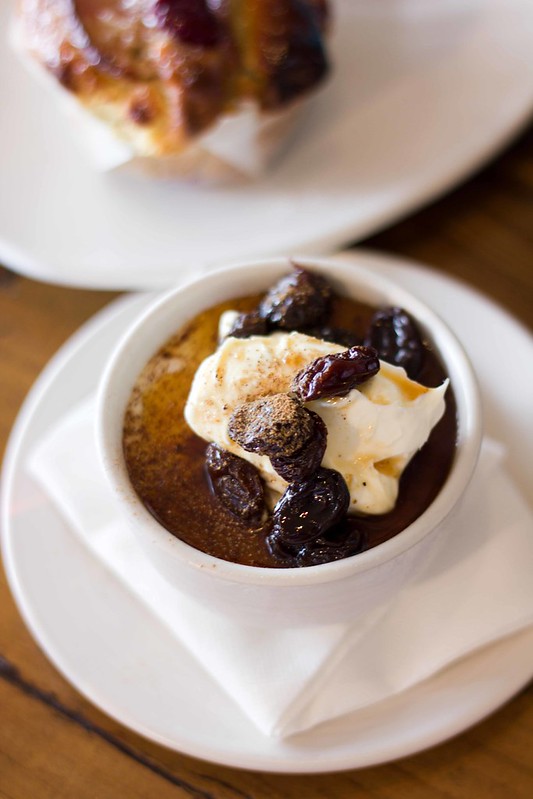
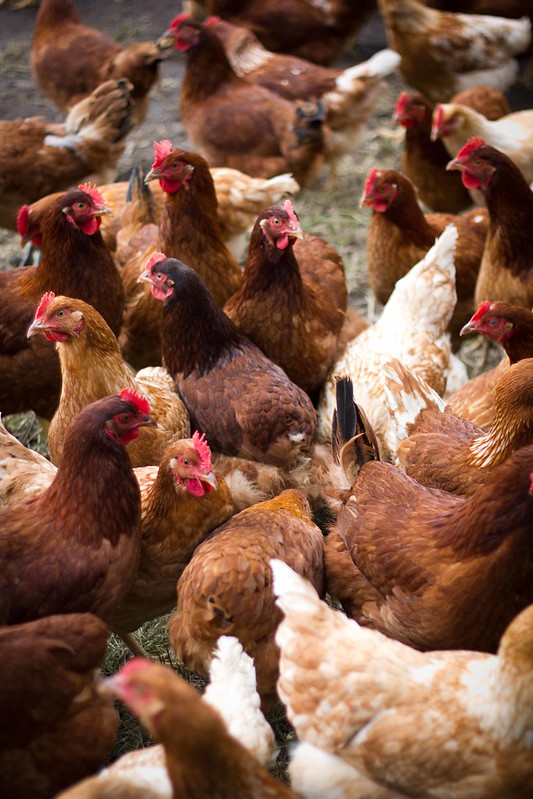
After lunch, we split up to go to different stops along the Wine Food Farmgate. I went with Michele, Michelle and Adrian to Green Olive at Red Hill Vineyard. Green Olive is a restaurant, a farm, a food store and a cooking school. Chef Patrick showed us around the farm, from the fresh vegetables and herb that get used in the restaurant to the chicken and sheep that also get used and sold. We sampled a Chocolate Parfait with honeycomb and it was stunning. The parfait was really smoothy and chocolatey and worked so well with the honeycomb, which had a hint of bitterness. We also picked up a number of produce for our dinner which we would be cooking. Chef Patrick helped us gather a number of herbs, oils, rubs, sauces and lamb sausage. It was such a beautiful haul and I was salivating already at the thought of what we could cook up.

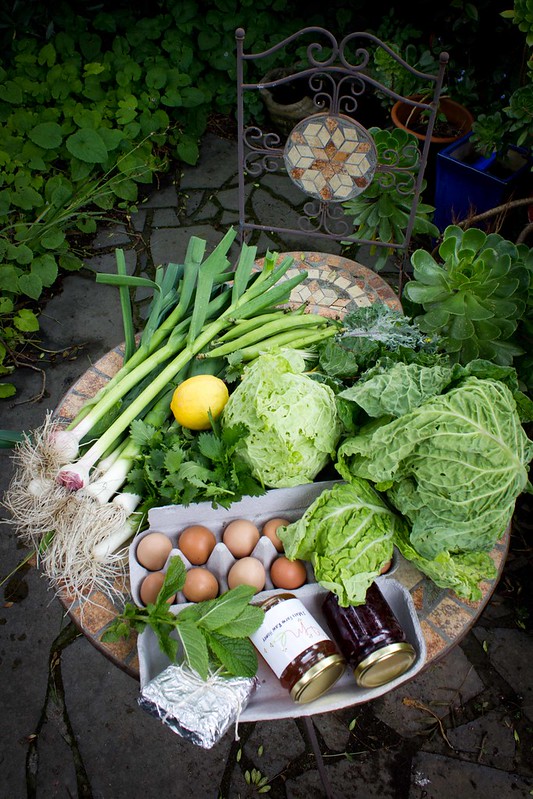
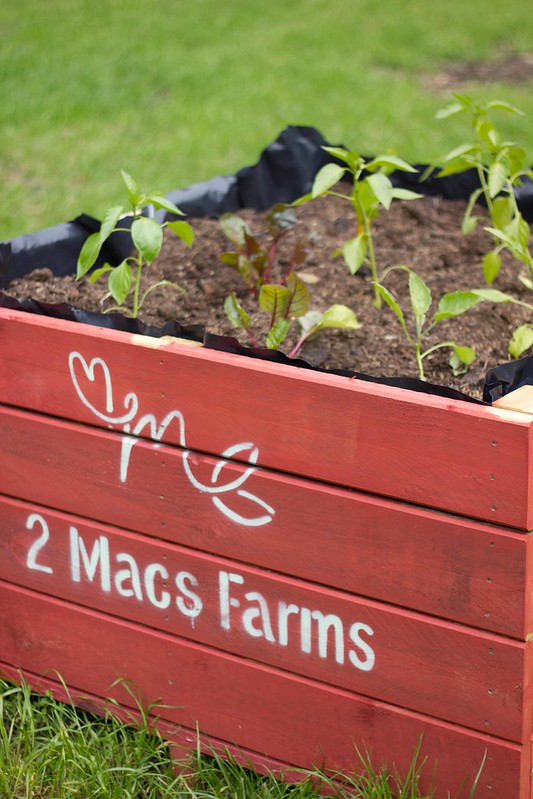
Next up, we went to my favourite stop for the trip, 2 Macs Farm. The wonderfully friendly Mary showed us around her farm which she runs with her husband Rob. Mary showed us around the farm where she plants lots of vegetables, keeps chickens, keeps lamb, harvest honey, makes raw butter, runs a B&B and soon will have a cooking school. It really was a delightful place and I'd definitely go back to stay at the B&B and take a course in the cooking school. Mary set us off on our trip with the best haul of goodies. There were leeks, garlic, cabbage, lemons, mint, honey, beetroot relish, raw honey, beans, nettle, pullet eggs (eggs from chickens under 1 year old) and my new favourite thing, raw butter, made with unpasteurised milk. The butter is so creamy and has a hint of sourness from the unpasteurised milk. It was so interesting to see the techniques that Mary used to grow and make her products and I have to say it definitely makes a different. Her produce are thriving and tastes so much better than the commercial stuff.

We all met back up at our accommodation for night, Max's Retreat at Red Hill Estate. The accommodation is stunning. A high ceiling classic house with 4 large bedrooms and beautifully decorated with eclectic decorations. It had a roaring wood fire heater, comfortable lounge area and a gigantic wooden dining room table. The kitchen was also well equipped so we got in there and started to cook up our dinner.

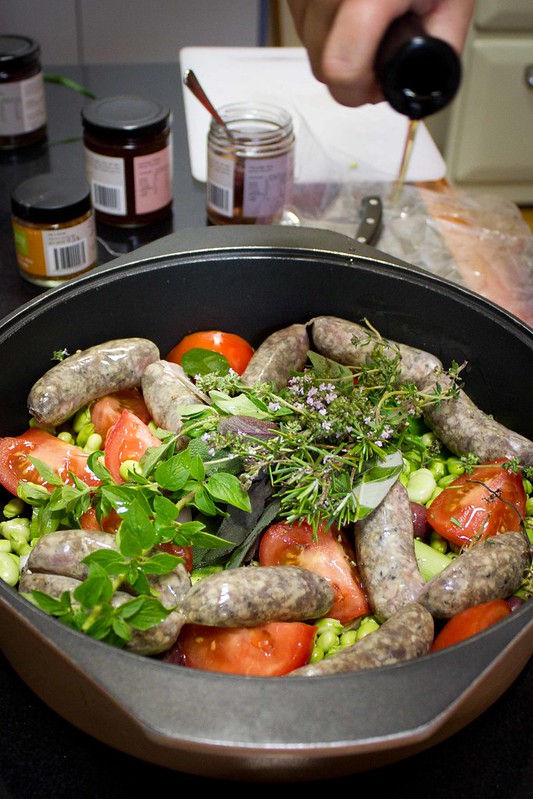
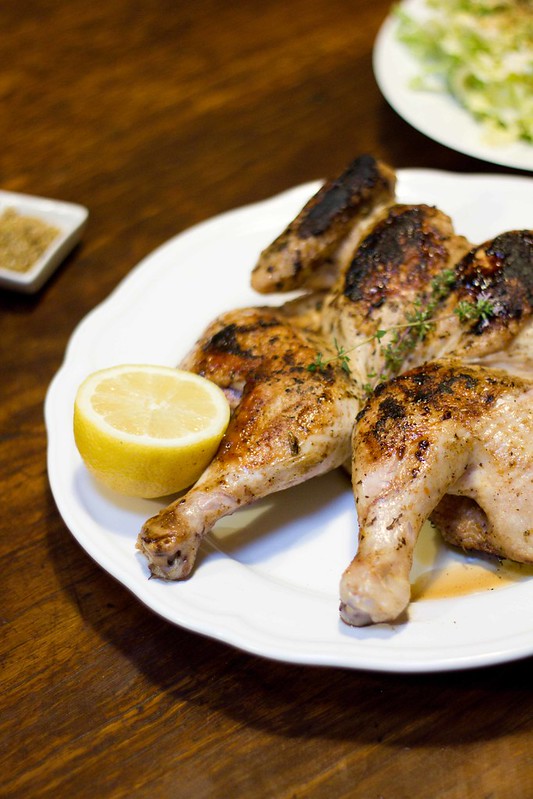
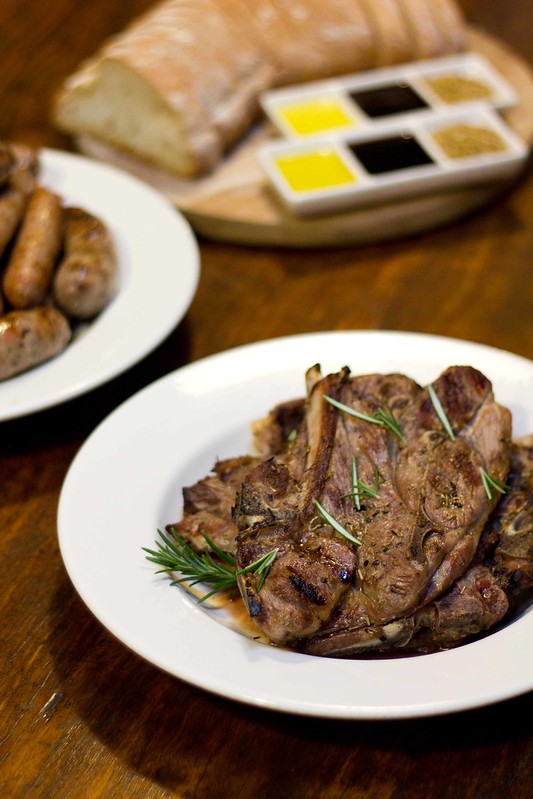
Everyone chipped in to help cook up dinner, in between watching the cricket of course and eating Red Hill Cherry Farm cherries. Michele used the lamb sausages and beans and herbs to cook up a lovely stew. Aaron was the king of sauces while I-Hua marinated the meats. Agnes and Michelle helped do prep work and hit the shops when we found out no one got bread. I was BBQ master (modest is my middle middle name) and BBQed sausages, lamb chops and a Peri Peri chicken. I was really happy with how everything turned out really well without being dry. Aaaron had brought a meat thermometer and we used it for the chicken and it ensured the chicken was perfectly cooked and still moist. Aaron also used the thermometer on the beef and it was perfectly pink. He combined it with a nettle soup/sauce and it was such an amazing dish, worthy of any restaurant. The meal was accompanied by the wonderful Yabby Lake wines and some Spotify retro music lists that Michele had organised. Mass karaoke ensued. After singing well into the night, it was time to go to sleep. While the bed was comfortable, I had a hard time sleeping. The intermittent rain on the metal roof was not something I was used it so I kept waking up to the sounds. If the rain had been continuous it would have been soothing, but instead I found it rather disturbing. Bring ear plugs if you stay here just in case in rains.

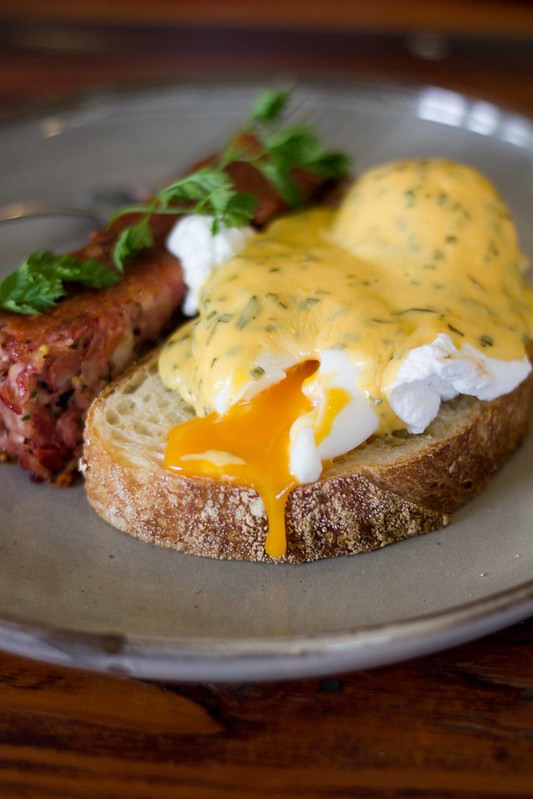
On our second day, we started our exploration at Somers General Store. I had been here before and Leisa, the owner, remembered me. The restaurant now has a liquor license and also opens during dinner on Friday and the weekends. Their primary thing is still breakfast and lunch, served in a really comfortable setting full of funky elements that will draw your eyes. We all ordered coffees and different meals. The coffees were good and I ordered the Ham and Eggs. A perfectly poached egg was served on sourdough with a hollandaise sauce and a huge slab of ham terrine. I loved all the element and the servings were so large I couldn't even finish it. The others ordered dishes of granola, Croque Monseuir, Eggs and Beans and the Big Breakfast that I-Hua got. The big breakfast was humungous, but being the brunch Queen that I-Hua is, she ate it all. Everyone liked their dishes but the massive servings defeated most of us.

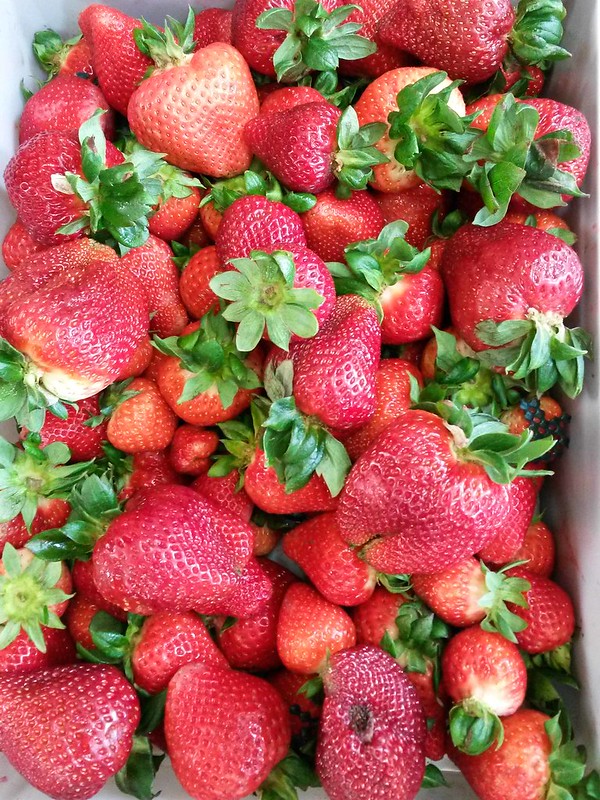
After a short stroll along the cold beach next to Somers General Store, we were all ready to go back to something warmer. Off we went to Sunny Ridge Strawberry Farm. I had not been there before, but wow, the strawberries were amazing, super sweet. I bought a few punnets to take home and eat, while sampling many while at the shop. You can pick your own strawberries, eat dessert in the restaurant and buy heaps of products from the shop.

The final stop on our trip was Mornington Peninsula Brewery. Owner Matthew told us about the origins of the brewery, which was when the Hawthorn Football Team won the 2008 Grand Final, he decided to start a brewery. As I'm a massive Hawks fan, I instantly liked the place already. We learned about the different beers that were brewed and then got round to sampling. We tried every, and I say EVERY, single beer that they serve, from pale ales, to IPAs to Brown Ales. I liked all the beers and the IPA and Brown Ale the most surprisingly. Usually I prefer lighter beers but these two really captured me.

The brewery also makes pizzas, so again we sampled a number of them. The pizza bases are made using beer, and they really worked. They were crispy and tasty. The toppings are kept fairly simple but there were lots of great combinations. Traditional flavours like salami, margherita, cheese sat aside pear & ham, lamb and yoghurt. All the pizzas were great and my favourite was the four cheeses one.

I had such a wonderful time on this trip and can't wait to go back to Mornington Peninsula and visit more places on the Wine Food Farmgate. There is such a huge variety of places to visit and I'm always finding somewhere new and great to visit. I highly recommend you check out the Mornington Peninsula region, as well as the Wine Food Farmgate trail for yourself. The region make a great one day getaway or for longer as it's very close to get to via the freeway now. I think you will enjoy the region as much as I do.

GIVEAWAY
*********************************************************************************************
COMPETITION CLOSED

Thank you all so much for all your wonderful entries.

Winners randomly drawn are SK and The Dream World. I will contact you to send you your prize.
*********************************************************************************************

2 x Voucher for a Family (2 adults, 2 kids) to pick and take home 1kg of cherries from Red Hill Cherry Farm.

The voucher expires January 31st 2015. Cherry season runs from November to January so it's worth booking in now.

HOW TO ENTER
Just leave a comment. You can write about anything.

Make sure there is a way for me to contact you. If I can't get in contact with you within 2 days, I will redraw the prize.

Conditions of Entry
- Anyone can enter. One entry per person. You can transfer the prize to friends or family.
- Competition closes December 18th 9pm AEST. The winner will be announced on the following day and published on this same post.
- The winners will be randomly drawn.
- I will contact the winner directly to get your address to send the vouchers.

Check out my previous posts about the Mornington Peninsula for some great places to visit:

Montalto Winery
Food Tour
Heronswood Garden
Red Hill Estate
Peninsula Hot Springs
The Long Table
Woodman Estate
Red Hill Brewery

Monday, December 09, 2013

Peanut Butter Cookies - Melt In Your Mouth Addictive

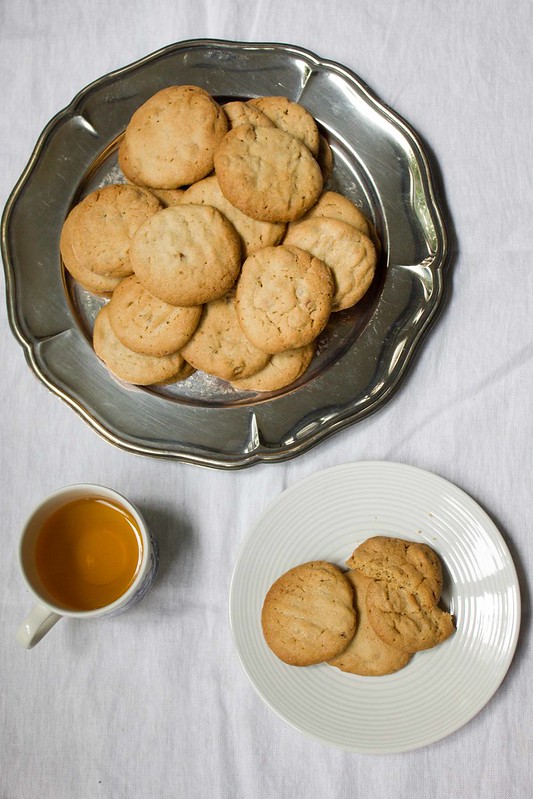
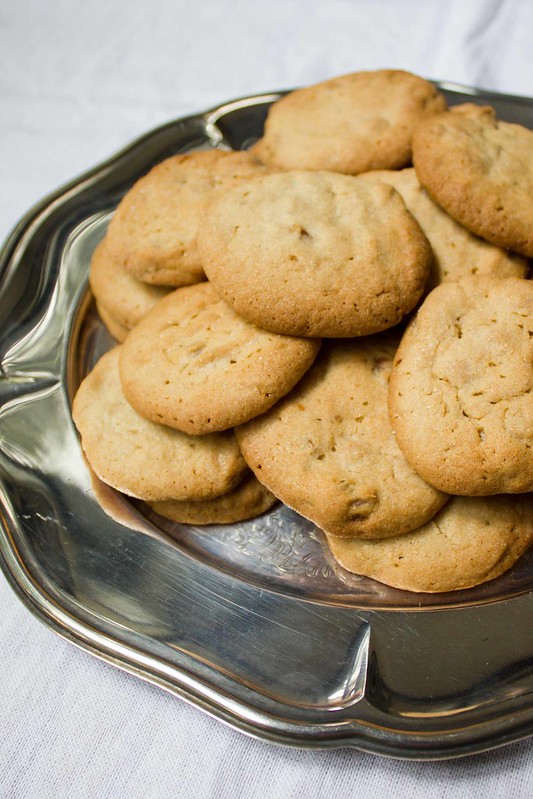
Show me someone who doesn't like peanut butter, and I'll show you one sad person. Who can seriously hate peanut butter? The rich buttery goodness combined with salty hits and possibly some crunchy nuts. Unless you have a nut allergy and eating peanut butter is life and death business, you must try making these cookies. They are so addictive you won't be able to stop at 10. I first tried them when the non-baker Ms I-Hua made them. I couldn't get enough of them and finished all the ones she gave me. I had to make my own to ensure supply didn't stop.

The cookies are extremely easy to make and only take a very short time to cook. The smell is intoxicating and despite it's simple look, is one of the best cookies I've eaten. It just melts in your mouth and you keep wanting more. I chose the option to use peanut butter chips and I think that made the cookies even better. I found peanut butter chips at USA Foods.

Some tips for making a great cookie

* The dough gets really soft to work with so take it out of the fridge and work quickly. Put back into the fridge to firm it up a bit if needed.

* You can use any combination of smooth or crunchy peanut butter and chocolate or peanut butter chips. They all taste really nice and it's up to your own preference. I went with smooth peanut butter and peanut butter chips.

* The caster sugar outside gives it a most wonderful flavour and crunch so really coat it in the sugar. It also stops the cookies from sticking to everything before baking.

Peanut Butter Cookies Recipe

INGREDIENTS

1 1/4 cups All-purpose Flour
3/4 teaspoon Baking Soda
1/2 teaspoon Baking Powder
1/4 teaspoon Salt
1/2 cup Unsalted Butter (softened)
1 cup Peanut Butter at room temperature (I used smooth)
1/2 cup firmly packed Light Brown Sugar
1 large Egg (at room temperature)
1 tablespoon Milk
1 teaspoon Vanilla Extract
1 cup Peanut Butter Chips
Caster Sugar (for sprinkling)

METHOD

1. Preheat oven to 170 degrees Celsius (fan forced).

2. In a bowl, combine the flour, baking soda, baking powder and salt. Set aside.

3. In a large mixing bowl, beat the butter and peanut butter mixture together until it turns fluffy. Add in light brown sugar and continue to beat until it reaches a smooth consistency.

3. Add in the egg and mix in well. Add in the milk and vanilla extract.

4. Add in the flour mixture (from the first bowl) and beat thoroughly.

5. Mix in the peanut butter chips and stir well.

6. On a clean plate, sprinkle some caster sugar around. To form the cookies, start by scooping out a teaspoon full of cookie dough and rolling it in the palm of your hands to form a ball. Place the cookie ball onto the sugar coated plate. Keep forming the cookie balls until the dough is all used up.

7. Place each cookie ball onto ungreased cookie sheets or a Silpat (if you have one), leaving several inches between each cookie for expansion.

8. Using a fork, lightly indent the cookies with a criss-cross pattern.

9. Bake cookies for 10 to 12 minutes. Do not overbake. Cookies may appear to be underdone, but they are not. They will harden up when they cool.

10. You should have roughly 60-70 cookies when you finish.

11. Leave the cookies to cool on the sheets for 1 minute, then remove to a rack to cool completely.

Monday, December 02, 2013

Food Photography Tutorial with Ewen Bell - Simple Tips to Dramatically Improve Your Photos

I've always liked food, and when I got my hand on my first digital camera, I also really liked taking photos. Combine the two and you have my love of food photography. I was extremely excited when I first got my DSLR that I used to take heaps of photos, most of them of food. I started to lose that motivation and found myself taking less photo as I wasn't happy with my own photos and didn't see any improvements. However, I've rediscovered my photography mojo and I have to thank Ewen Bell, professional photographer, for that.

On a trip to the King Valley, which partly was to explore the valley but also to learn how to take food photos, I learned so many tips from Ewen and I feel I have improved my photography so much. You can see some more photos that I took on the trip in the posts below.

King Valley part 1
King Valley part 2
King Valley part 3
King Valley part 4

In this post, I will share some of the tips that Ewen shared with me. I've explained a lot of things in very basic language, which some of you may already know so please excuse me. For others, it may be useful to understand the theory behind things and also the terminology. In regards to the tips, they can apply to all types of photos. However, they are probably more suited to food and scenery, things that tend not to move too much. Taking photos of people is a whole different kettle of fish. The tips are in no particular order and can be used in conjunction with each other.

1. It's All About Context
Whilst I said the tips are in no particular order, this first tip is probably the most important and what Ewen kept drumming into my brain. When shooting any type of photos, you need to provide the viewer with some context. For example, if you shoot a person close up, you can't tell if they're tall or short. You take the shot again with a person standing next to a car, and you can get a rough feel of how tall or short that person is as most people know how big a car is.

Hence, for most photos, it means you want to shoot a little bit wider, so that the viewer can comprehend what they are seeing and how they can relate to it. For food in particular, this may mean showing a few other objects around a plate of food so you can get a sense of the setting. Believe me when I say that shooting a bit wider will actually draw the attention of the viewer closer into what you want to focus on. Shooting a bit wider does not mean that you just randomly snap a photo. Far from it. You still need to find what you think the focus should be in a photo, and frame your photo around that. This tip is just a general tip so of course there are still occasions where you want to shoot extremely close for some particular reason. But as a whole, context really helps to make a better photo.

In the photo below, my focus was the teapot and tea cups, which obviously are in focus. Normally I would have zoomed right in on the tea set and while it may still look quite nice, it doesn't give the same effect as this photo I feel. Here you can see that the tea set sits on a nice table and in the background you can see the beautiful Ashley having a sip of her wine. The scene is far richer in content and you gaze gets drawn around the photo, which is the aim of any good photo I believe. In this photo, my eyes are drawn from the cups to the tea pot, to Ashley, to the wine glass in her hand, to her bright hair and finally to the couch and the red walls. A very interesting photo if I say so myself haha.
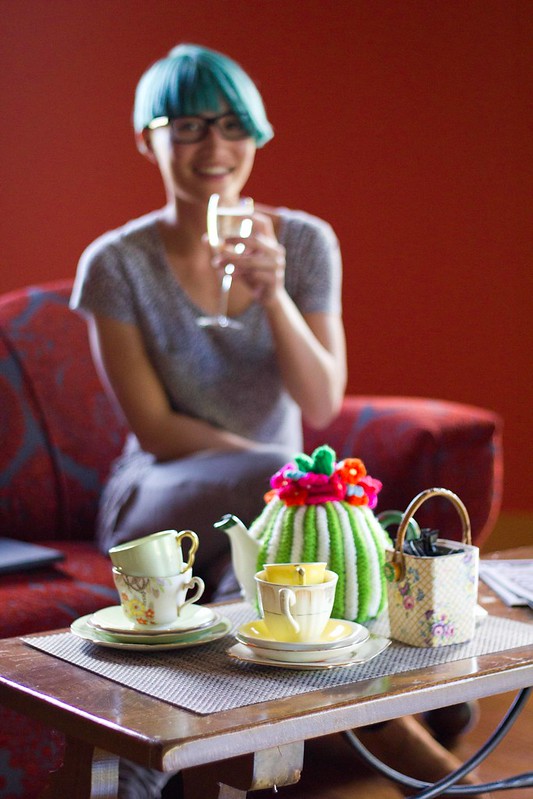
So in summary, for most photos, try to shoot a bit wider to capture more things and give some context to the item you want to pull focus onto.

2. Shoot F2 or F8
On a camera, the F-number is the ratio of the lens' focal length to the diameter of the entrance pupil. In lay-mans speak, the F-number (F-stop/focal ratio) is a measure of how much light can enter a lens. The more light that enters, the brighter a photo can be. A low F-number equates to more light enter. However, you don't get anything for free. A lower F-number may allow in more light, but it also reduces the depth of field of an image. The depth of field is the amount of space that is in focus. A large depth of field means more of the photo is in focus from the front to the back, while a low or shallow depth of field means only a small section of the photo will be in focus.

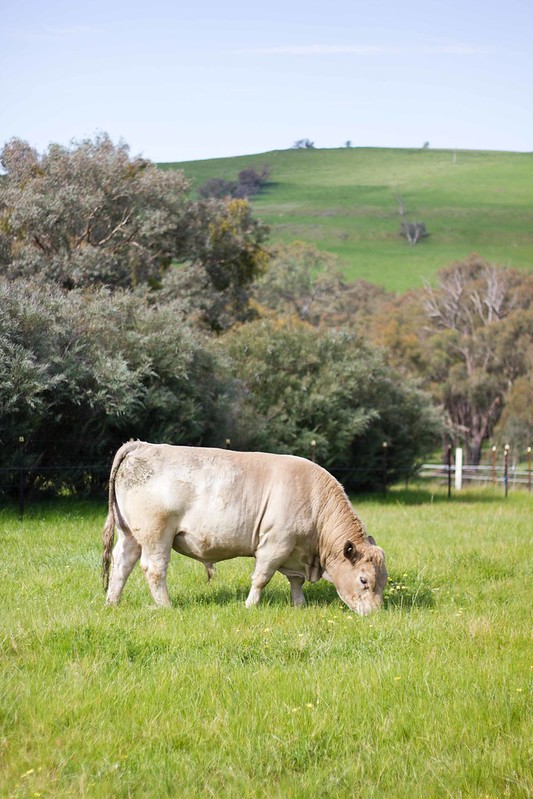
For scenery, Ewen suggests using F8 on your camera. On point and shoot cameras, you may not be able to adjust the F-number. They do usually have different modes so pick the scenery mode. That will most likely put your camera in a mode that uses a higher F-number. As a scenery photo tends to cover great distances, you want a higher F-number that will allow more of the main subject to be in focus while still blurring out some of the background or foreground to draw the viewers focus in. Below, you see the cow in focus with enough context to see that she is in a field in a beautiful mountainside.
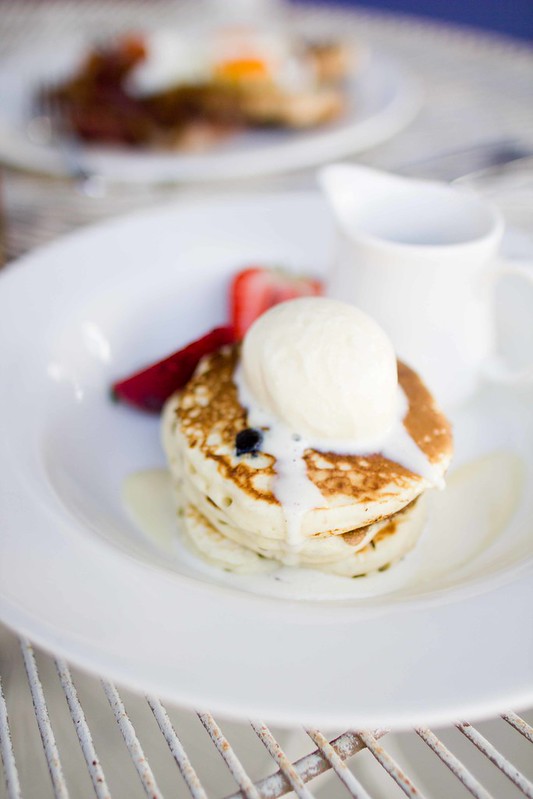
For food photos, Ewen suggests mostly using F2 for all shots, and only switching to another F-number if you have a really good reason. He suggests that you don't gain much more with the other F-numbers unless you are going for some specific look. With F2, it gives a very low depth of field and really forces you to focus on the main object. The depth of field isn't too low like F1.4 which you have to use very carefully as you lose context generally due to the extremely low depth of field. For F2, as shown in the photo below, my intention was to guide the viewer to focus on the melting ice cream over the beautiful fluffy pancakes. You can still make out the strawberries and jug and get a sense that there's some other food in the background, which all help to give a sense of context and entice the viewer to want to eat the food. Even if you shoot from top down, F2 is still the preferred setting. It will help to keep the main object in focus and blur out any other on a different height. However, if you want everything to be in focus, choose F8.
So in summary, use F8 for scenery photos and F2 for food photos most of the time. If you know what look you want, you can choose other F-numbers but make sure you know your intentions before deviating from these settings.

3. Try To Avoid Centering Photos
In general, having the subject right in the middle of the photo makes for a very boring photo. If you shoot a bit wider, you can always crop it a certain way to make sure the subject is not right in the centre. Have items to the side or even partially cut off as it creates interest and again forces the viewer to look around the photo.

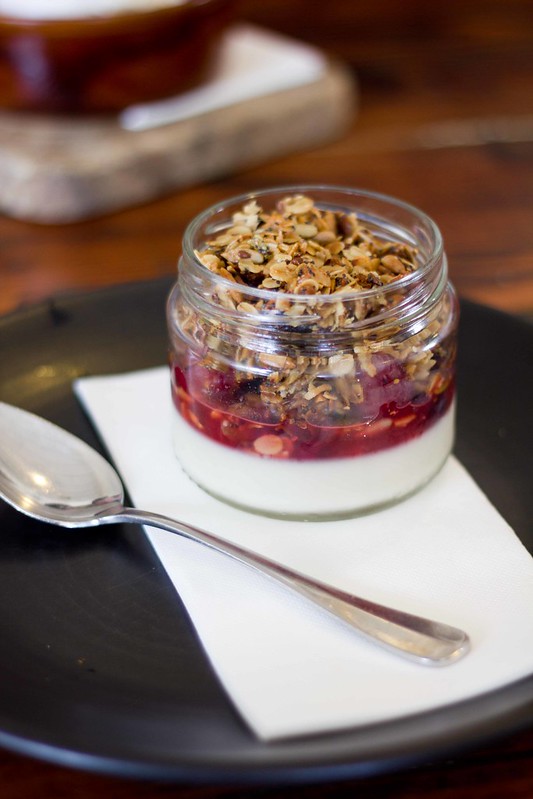
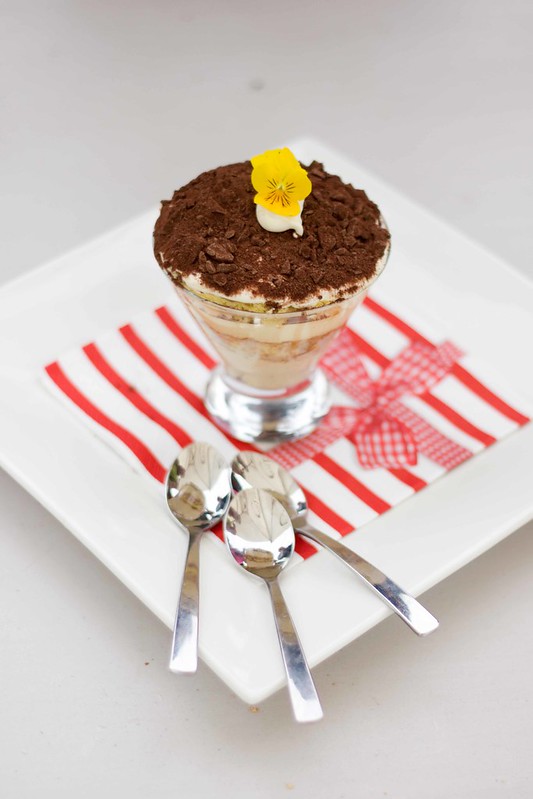
You can still centre photos but make sure that's your intention and you consciously choose to centre a photo for a good reason. In the photo below, I wanted the dessert centered as I like the symmetrical look of the glass and the angular plate. The spoons are still a little off centre so provide some interest to the overall photo. If you want to shoot perfect symmetry, it's very hard to setup and you have to make sure you get it perfectly symmetrical or it will look very wrong.
So in summary, ensure objects in photos are off centre and only centre a photo when you have a specific vision in mind.

4. Use Empty Space To Draw The Viewer In
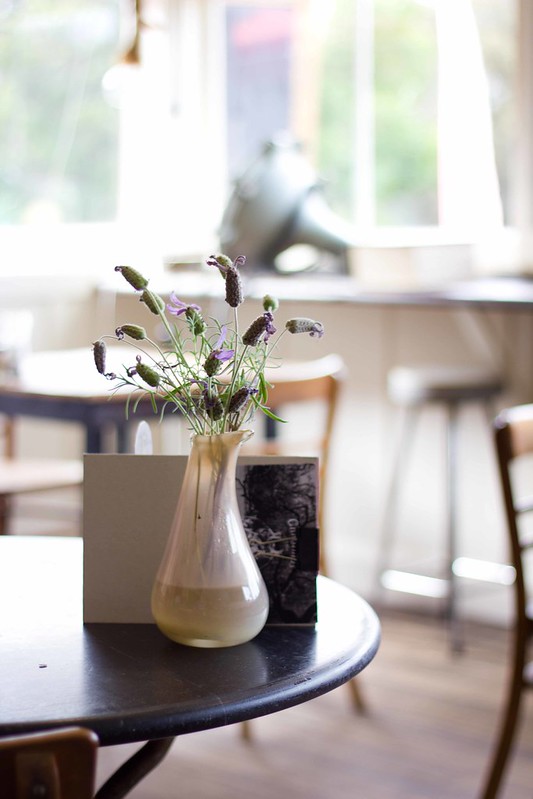
Just like Rule 1 to provide context, using empty space also provides context to a photo, and leads the viewers gaze to the main subject. The space can be in front, to the side or behind the main subject and will all help to draw focus into the main subject. In the photo below, the beautiful table leading away from the flowers creates focus on the simple flower arrangement on the table.

So in summary, use empty space around the main subject to draw focus onto it.

5. Use Complementary Colour Palettes and Textures
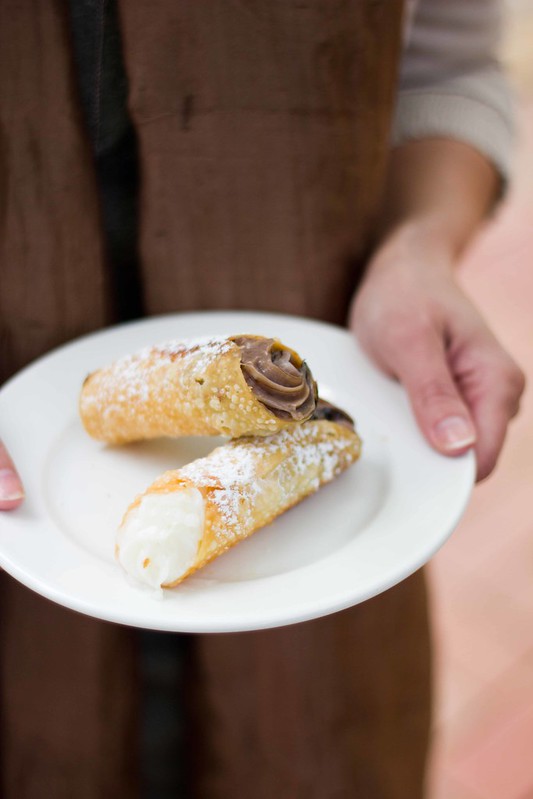
Some colours and textures are really hard to make work. It's not impossible but you do need a good eye and choose the right tones of those colours. For example, I think it would be extremely hard to make a strong purple and orange colour work harmoniously. Hence when you are shooting a photo, if possible try to set it up so that colour compliment each other. In this photo, Ewen noticed that Sarah was wearing a nice brown crumpled scarf that complimented the cannoli. The colour palette in this photo works well together to give a nice comforting feel. Can you imagine if the background was a shocking bright pink or purple. I think it would be quite disjointed.
So in summary, try to choose colours and textures that compliment the colour/texture of the main subject.

6. Shoot Into Light and Create Overexposure
I've always been taught that I should shoot with the light so this tip was quite confronting for me. Ewen taught me that you can shoot into the light and have overexposed parts (get your mind out of the gutter) in a photo and it still looks great (*gasp* overexposed photos used to be my worst nightmare). When you shoot into the light, to get the foreground bright enough, it tends to mean that back where the light is really bright. Unless you want to edit the photo meticulously, there will be overexposed parts. However, you can use this to your advantage to create a glow from behind the food that really draws focus onto the food at the foreground. Below, you can see that the back part of the photo has become completely saturated but the brightness actually makes you look at the muffins and croissants at the front.
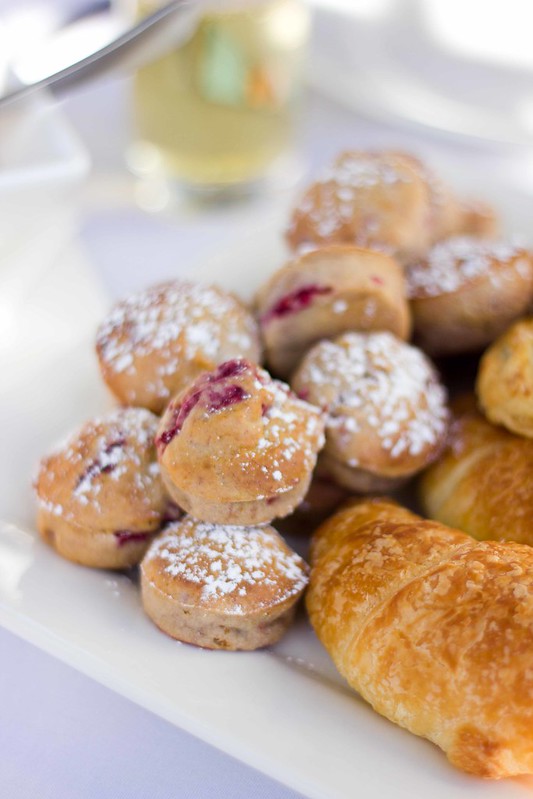
So in summary, don't be afraid to shoot into light to give a different look and overexposed parts of the photo can actually enhance it.

7. Fill Up Space To Create Interest
Of all the tips from Ewen, this one was the one I found most confronting at the beginning. I used to shooting the main food subject and not having much around it to draw the focus onto the main subject. However, as with the earlier rule, context helps to draw a viewer into a photo. Objects around the main subject help create interest and when used in conjunction with the F2 rule, the other objects are generally blurred and you get a presence of them without the items detracting from the main focus. In the photo below, you can see some other plates and food items but I believe the main focus is firmly on the wonderful beetroot salad.
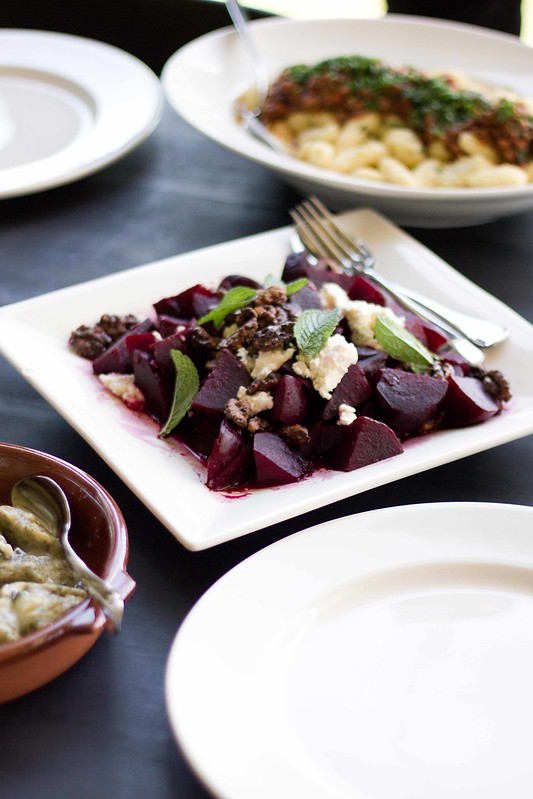
So in summary, don't be afraid to fill up the photo with other objects that create context and create more interest around the main subject.

8. Use Different Compositions and Angles To Change Focus
This tip sounds so obvious but I think few of us actually do it. Ewen suggests firstly to shoot from different angles, and second by changing the composition of a photo around to get a different look. I was thoroughly amazed how different the photos look just purely shooting from different angles, both vertically and horizontally. What I mean is to shot from higher to lower and to shoot around a subject. In the photo below, we tried shooting from different angles and I hardly recognised it was the same setup. In the end I decided this angle was my favourite as it allowed the viewer to clearly see the rocky road.
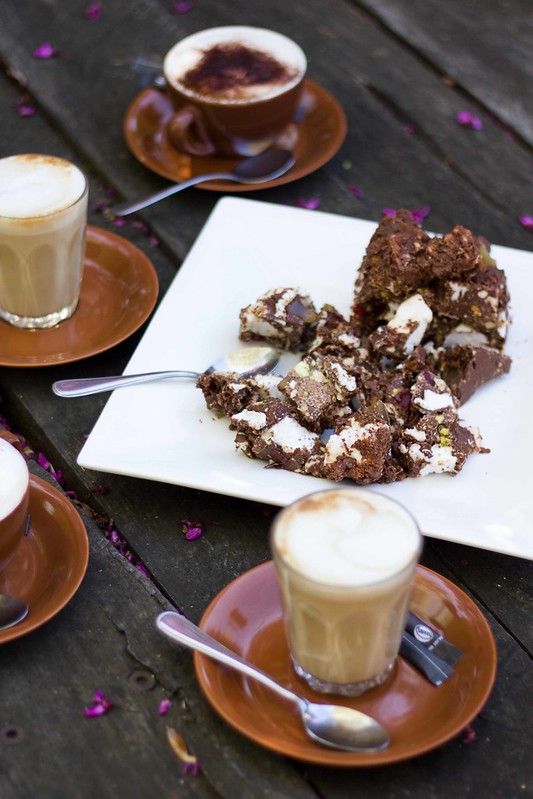
The second tip is change the composition of a photo. This can mean simply moving a few items around. The items in the photo below are exactly the same as in the photo above. However, by lining them up and shooting it the way it is, the focus is clearly on the coffees now rather than the rocky road.
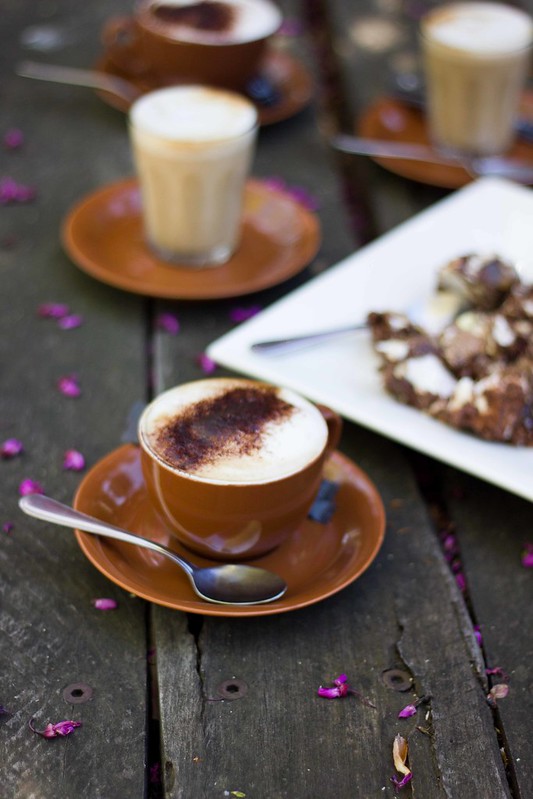
So in summary, shoot from different angles to see what provides the best focus on the main subject, and don't be afraid to move items around to change the composition and again change the focal object.

9. Use Contrast and Saturation To Create a Natural Feel
Once a photo has been shot and cropped, there is still capability to change the look and feel of a photo. Contrast and saturation are two powerful tools that can really change the feel of a photo. In general for food and scenery, Ewen suggest increasing contrast to provide more definition of the main subject, and reducing saturation to give a more natural feel due to the contrast causing an unnatural look. Those two things generally have to work together. If you increase contrast, you drop saturation. If you reduce contrast, you increase saturation. Sometimes you can break the rule but again you must have a specific vision in mind. I used to greatly increase the saturation of my food photos as I thought it made it more enticing but having tried this new method, I far prefer a high contrast/low saturation photo. It definitely feels far more real and natural. In the photo below, I increased the contrast to give more definition to the leaves and some brighter parts, and reduced saturation to give the leaves a nicer green.
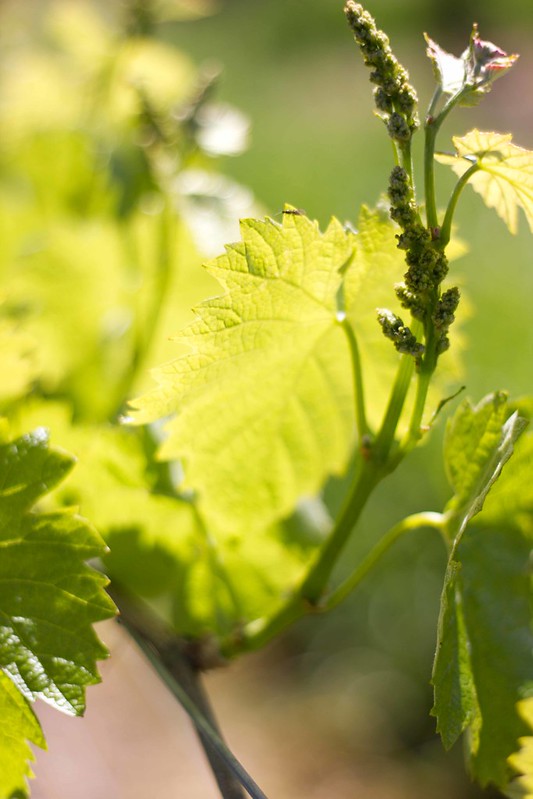
So in summary, generally increase contrast on a photo and reduce saturation to give more definition and a more natural feel.

10. Use Colour Tints and Black and White To Create Impact
Lastly, changing colour tints or even go to the absence of colour to create black and white photos really change the impact of a photo. I always thought that black and white can't work for food photos, but Ewen showed me that it can work. I'm still hesitant to use a lot of black and white for my food photos but used correctly, it can create a lot of impact. As with any other photo, it can be hard to visualise the impact of an edit, and this is especially the case for black and white. One tip is to use the black and white preview on your DSLR so you can see what the final photo may look like such that it allows you to change the composition or settings.

In the photo below, the black and white really makes the photos quite strong as the focus is on the lines of the glasses, the bubbles, and the shadows that's created. It makes what is quite a simple photos into something very interesting and really catches your eye due to the lack of colour.
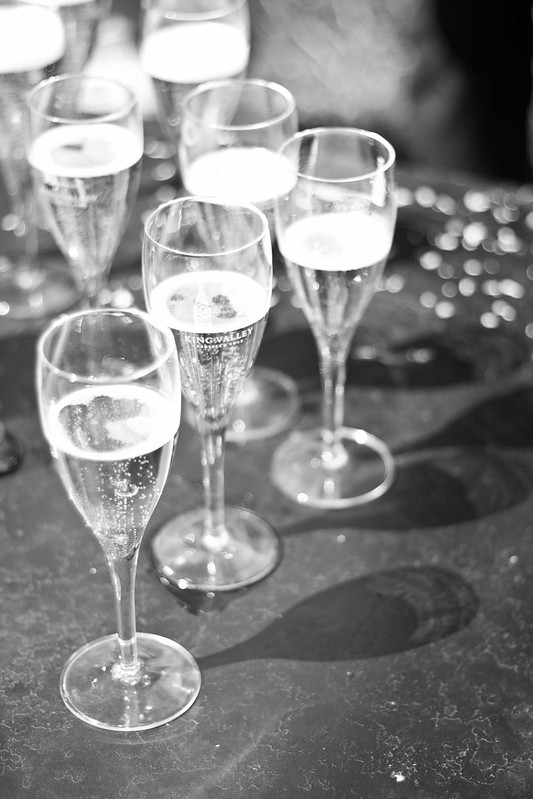
So in summary, using colour tints or black and white can create impact as it forces the viewer to look at the composition, shapes and shadow more closely due to the lack of colour.

And that concludes some tips I learned from Ewen about how to take better photos, in particular food photos. I have consciously thought about these tips and applied them to my photography and I feel my photos have improved dramatically. I am enthused about food photography again and am experimenting with lots of different setups. You can check out my experimentation on my Instagram account ieatblog. Thanks so much Ewen for giving your time and passing on all these amazing tips. It's made food photography fun for me again as I love my own photos now. (#modestmuch #selfpraise #selfbow)

I hope you've found these tips useful. They're just a start to help get you going and you can learn a lot more with your own experimentation. Also, check out Ewen's websites for even more tips and interesting articles. Soon you'll be shooting lots of great food photos and having lots of fun doing it I hope.

EDIT:
It turns out that Ewen has written up an awesome post about food photography too, so go read that as well here.